Keqing Cosplay Construction Details
Genshin ImpactFeb 1, 2023
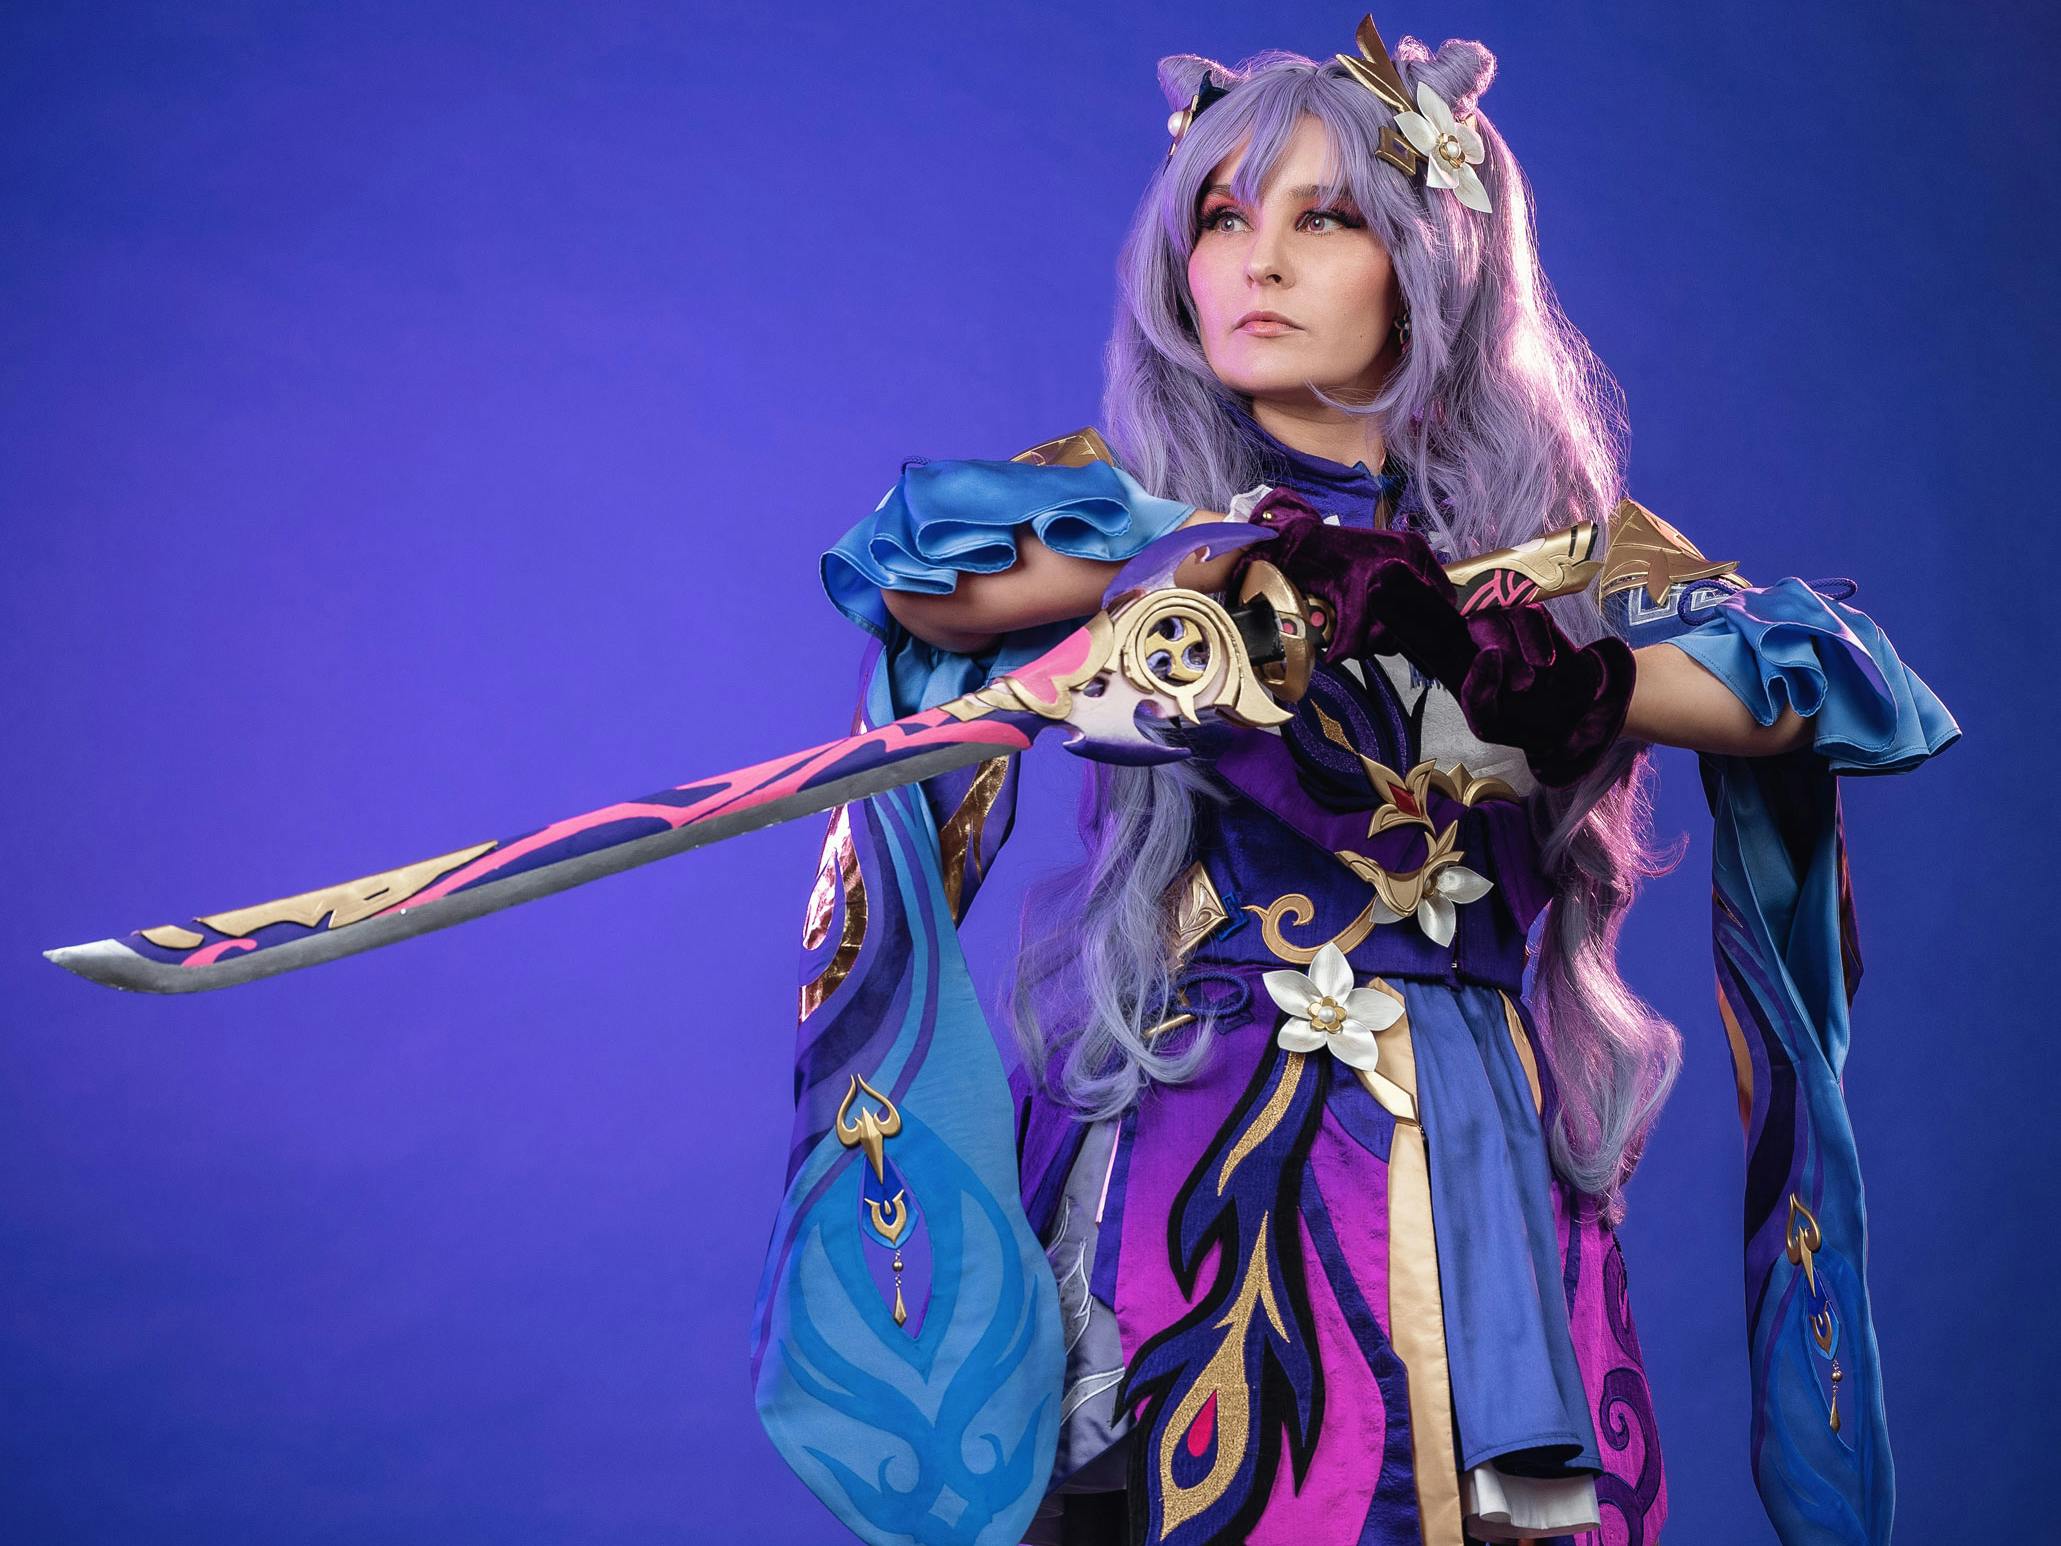
I chose to cosplay Keqing because I’m a huge fan of Genshin Impact, and I just think she has a gorgeous character design that I thought would be both fun and challenging to bring to life. This cosplay pushed me to try multiple new skills beyond just sewing, and I’m very proud of the final result. Below you will find a detailed overview of how I created this cosplay.

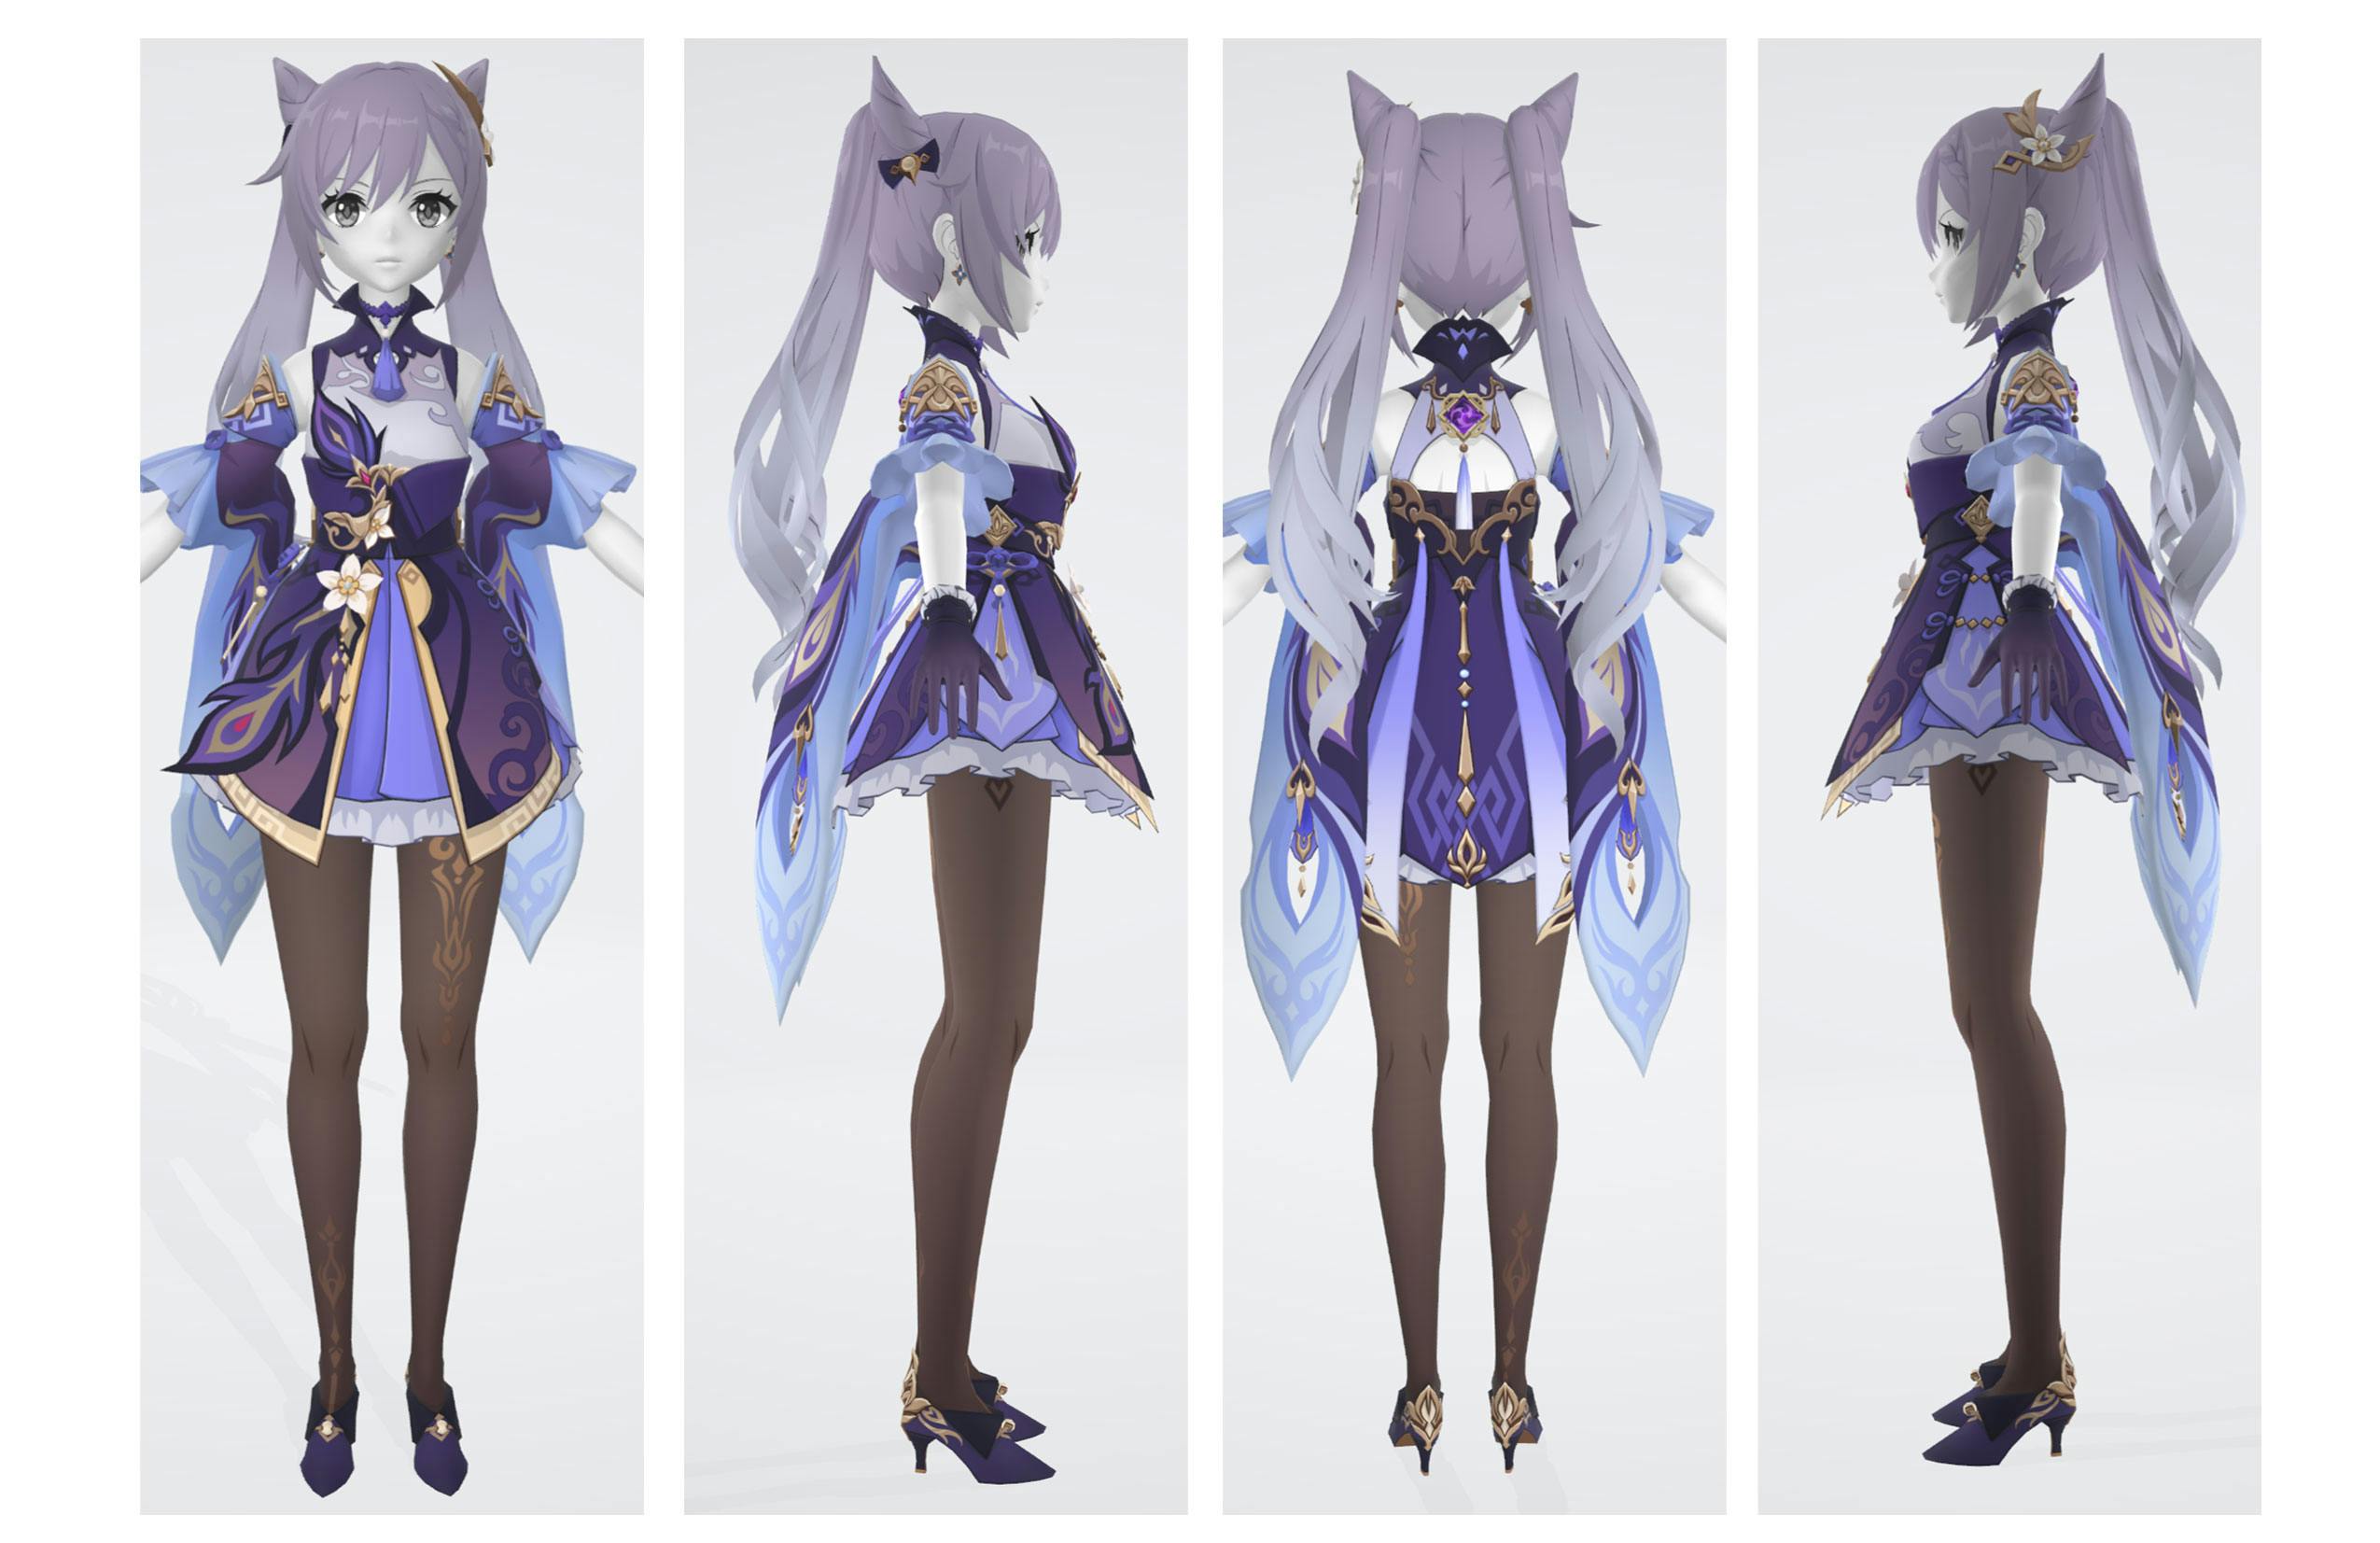
Capture from the Genshin Fashion Archive: https://gamesfashionarchive.net/

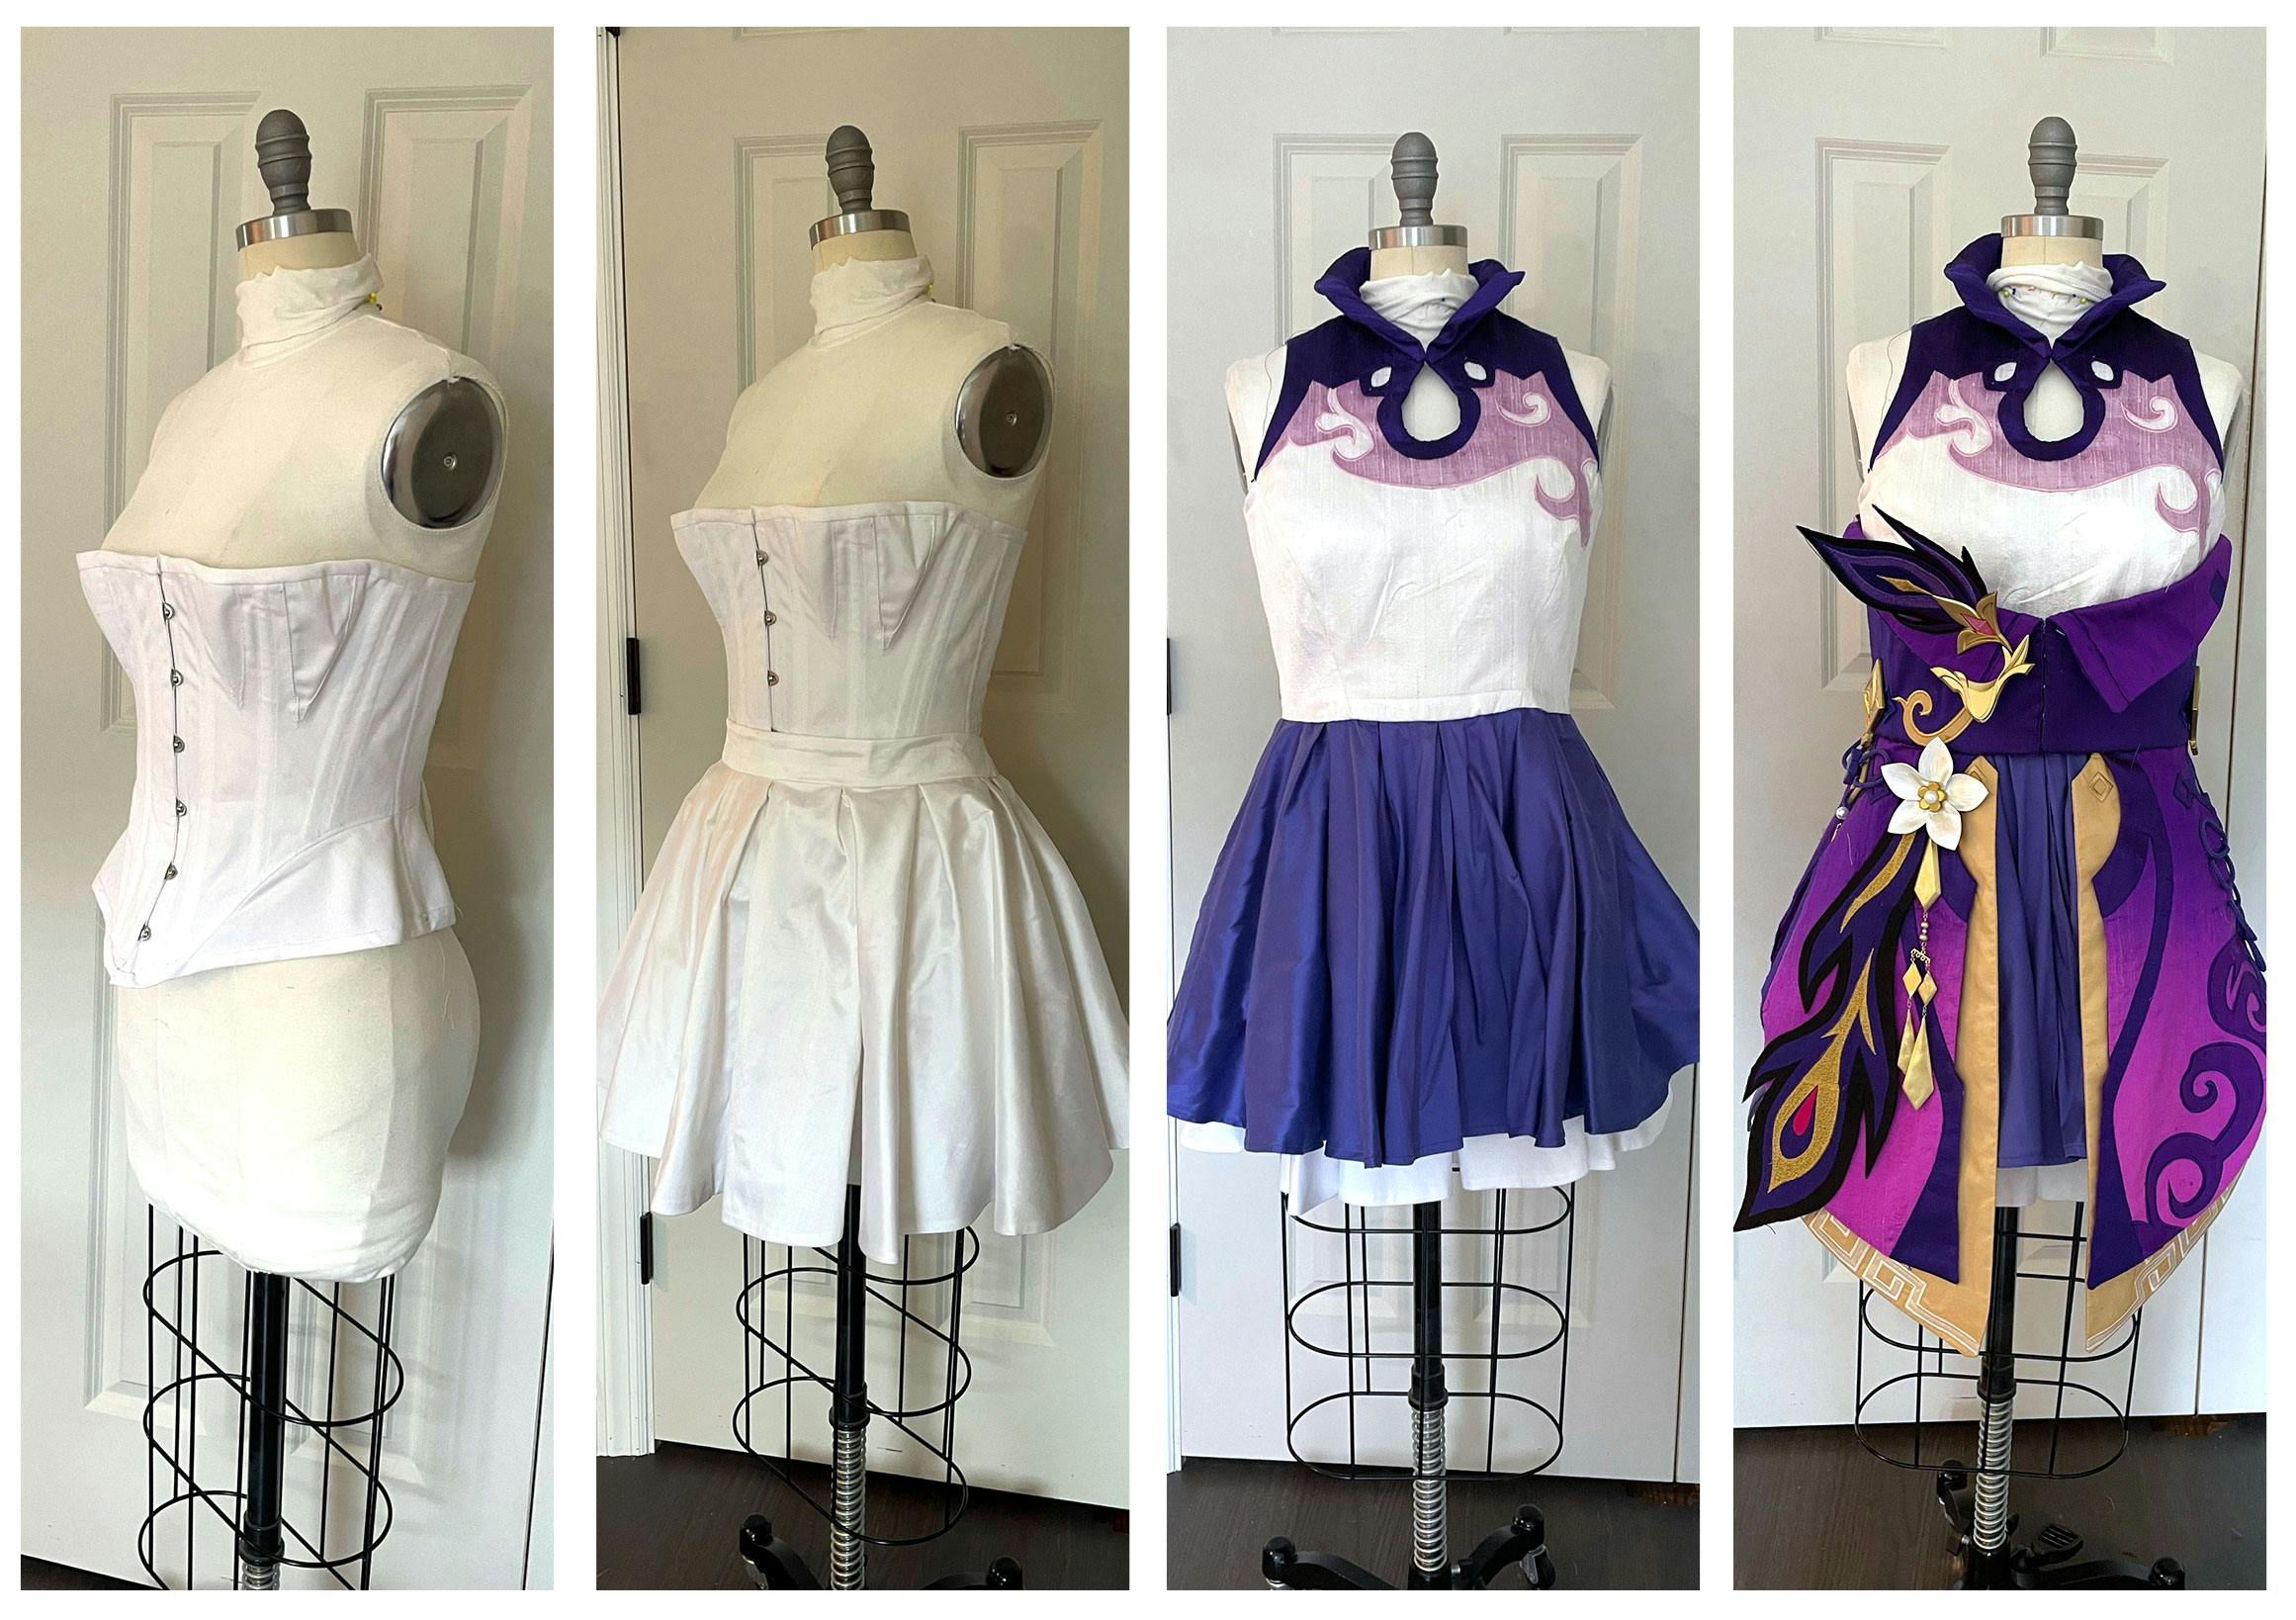
The costume is made up of the following 4 layers (all sewn by me):
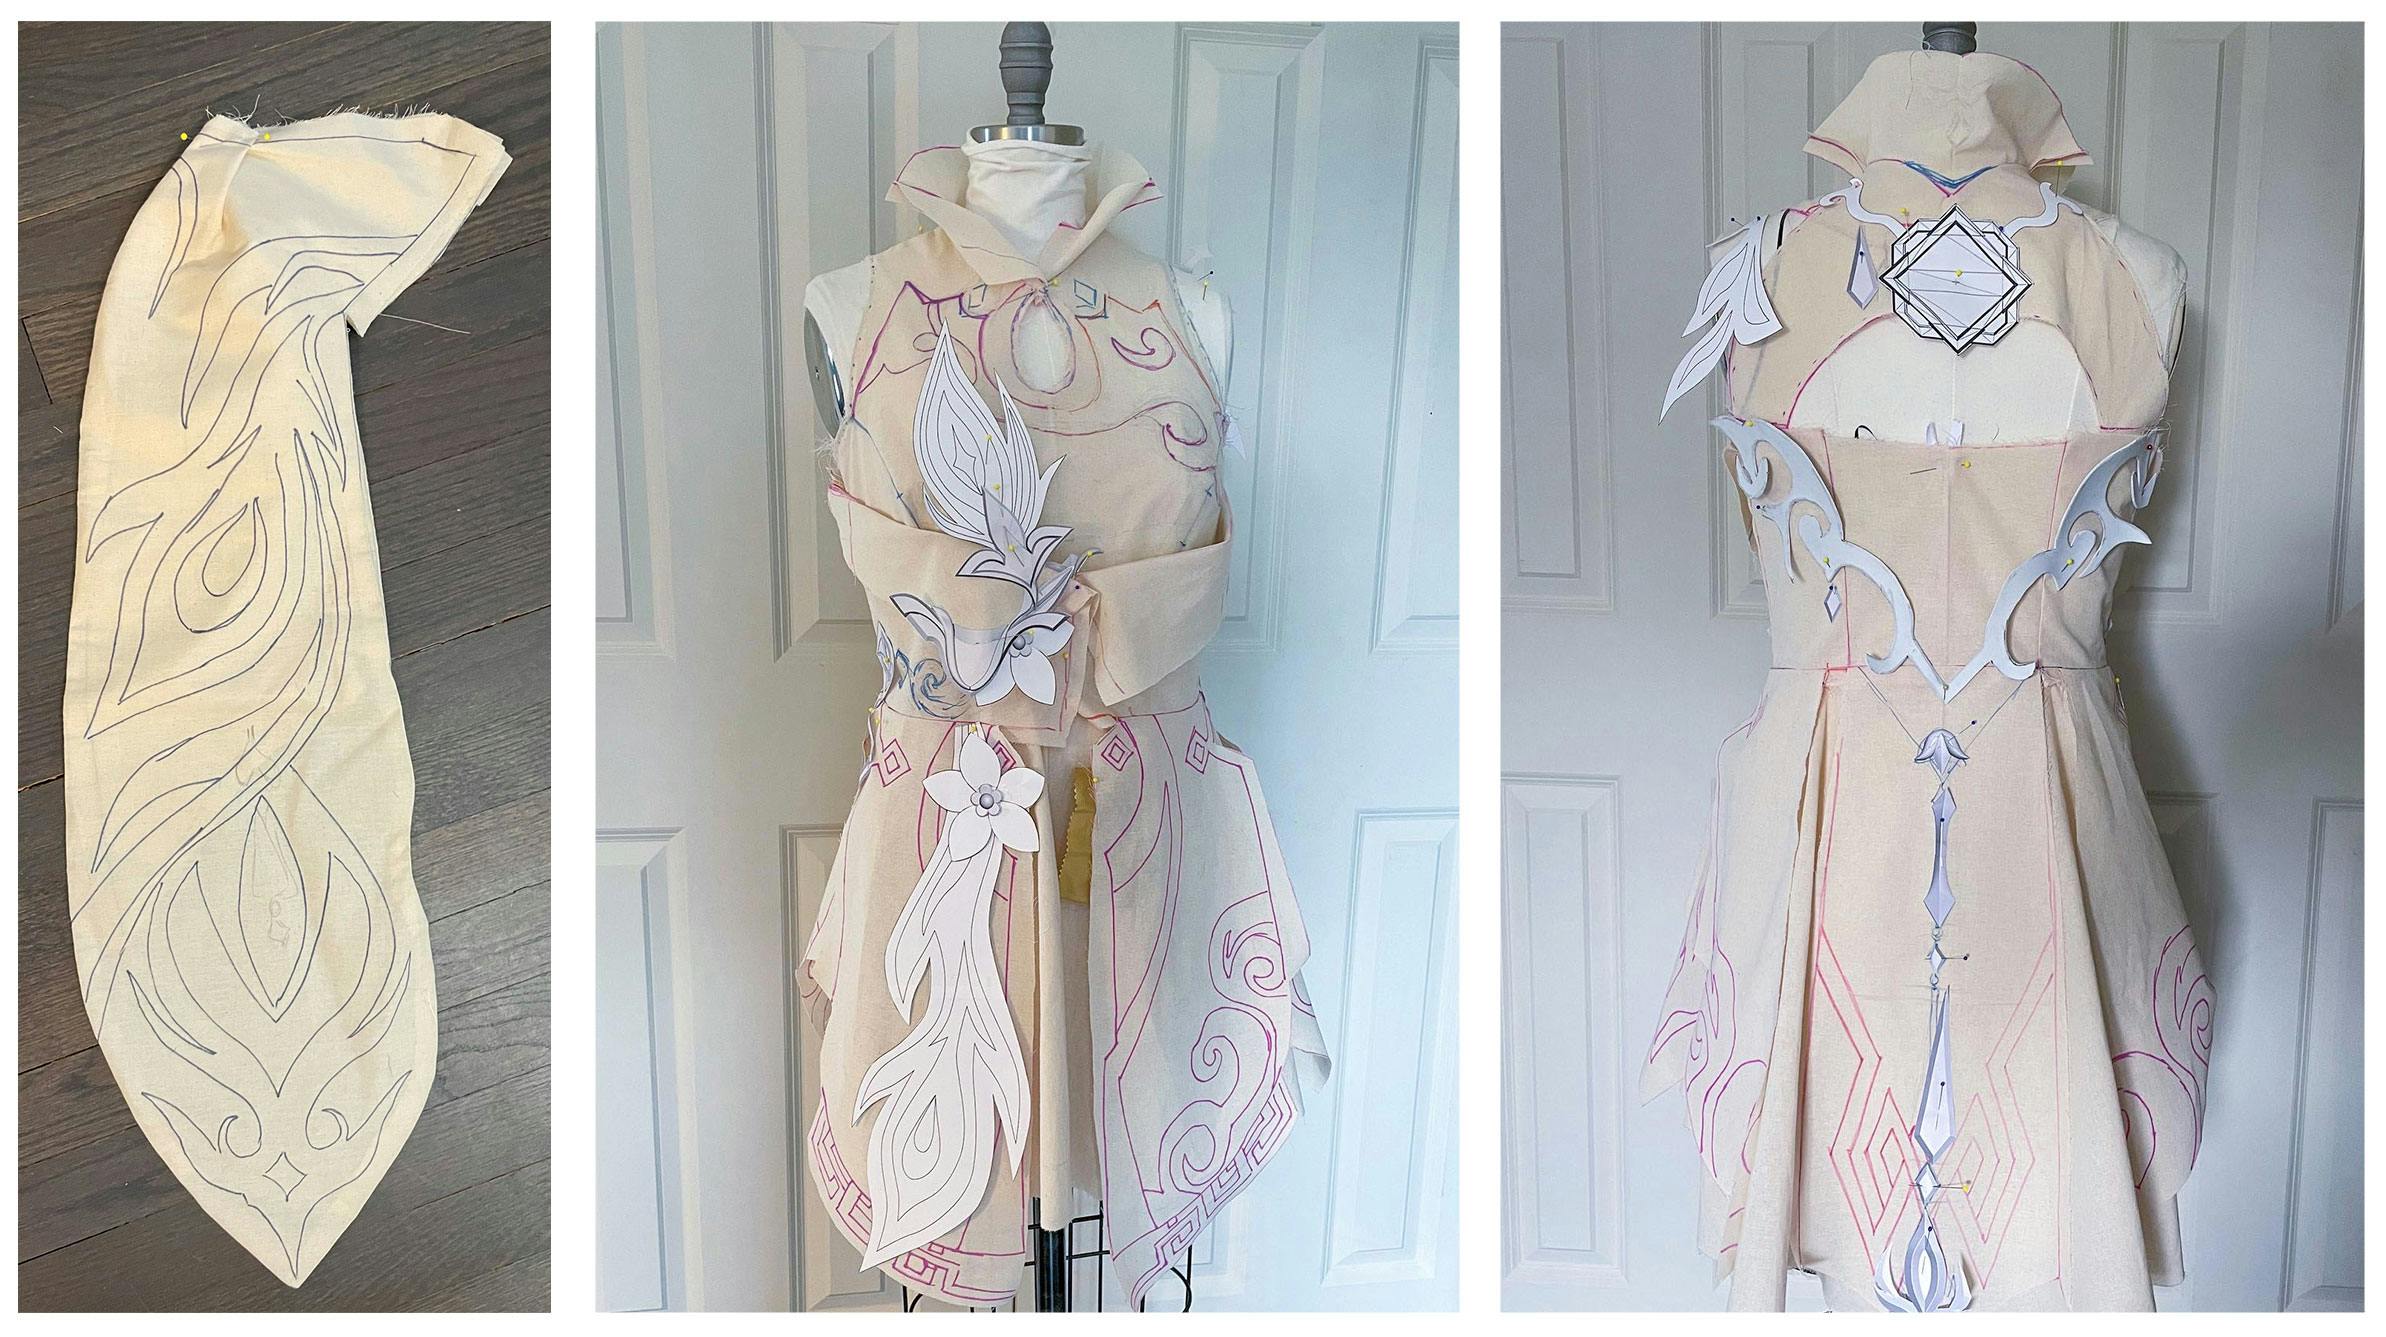
Patterning
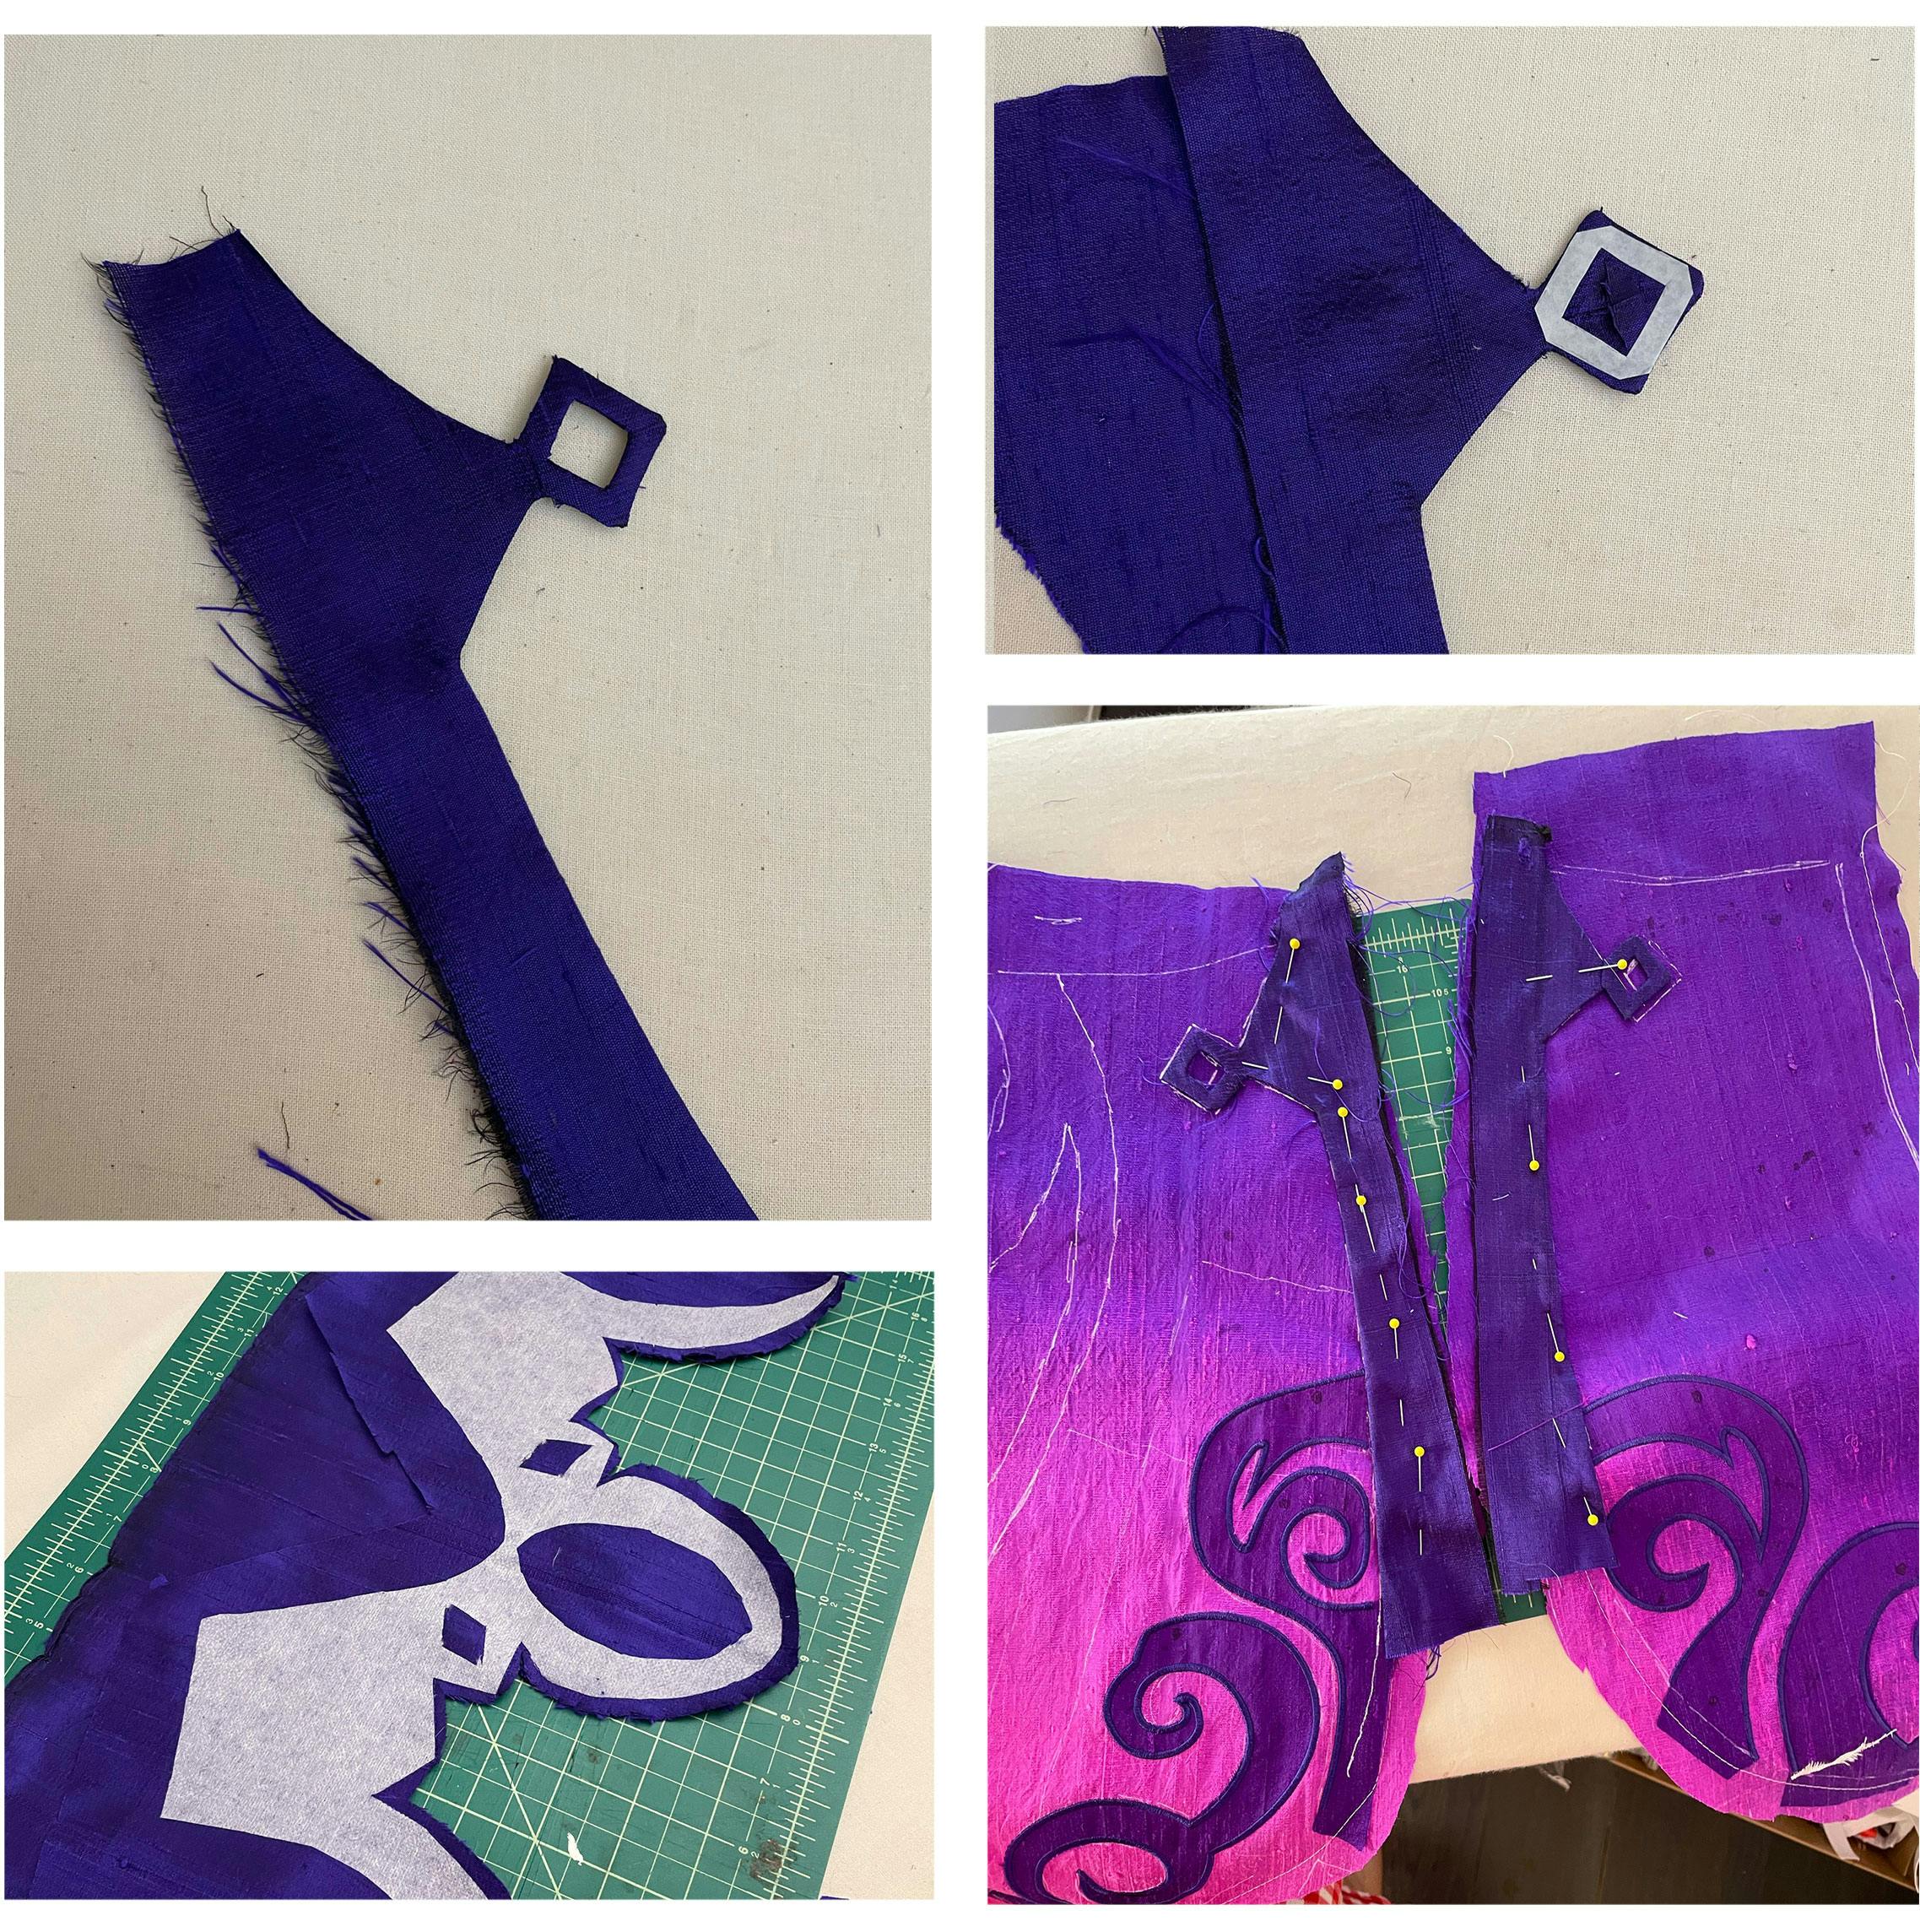
I started by taking a basic princess seam block pattern, and slowly chipping away pieces until I had the main underdress pattern. The skirt and underskirt are simple circle skirt patterns which I made longer in back.
Once that was done, I draped the overdress over the pattern and tweaked the placement of everything. The front panels started out as a circle skirt that I then slowly patterned out into individual panels.
All the muslin patterns were scanned and converted into SVGs in Illustrator so that I could then work on creating the embroidery motifs and make sure each embroidery motif would be scaled and positioned correctly.

Fabric Dyeing
Before I could being sewing, I had to find right the right shade of purple silk that, when the dye was removed, would leave the right shade of pink. In the end, there was only 1 winner: Amaranth Purple Dupioni Silk from NY Designer Fabrics

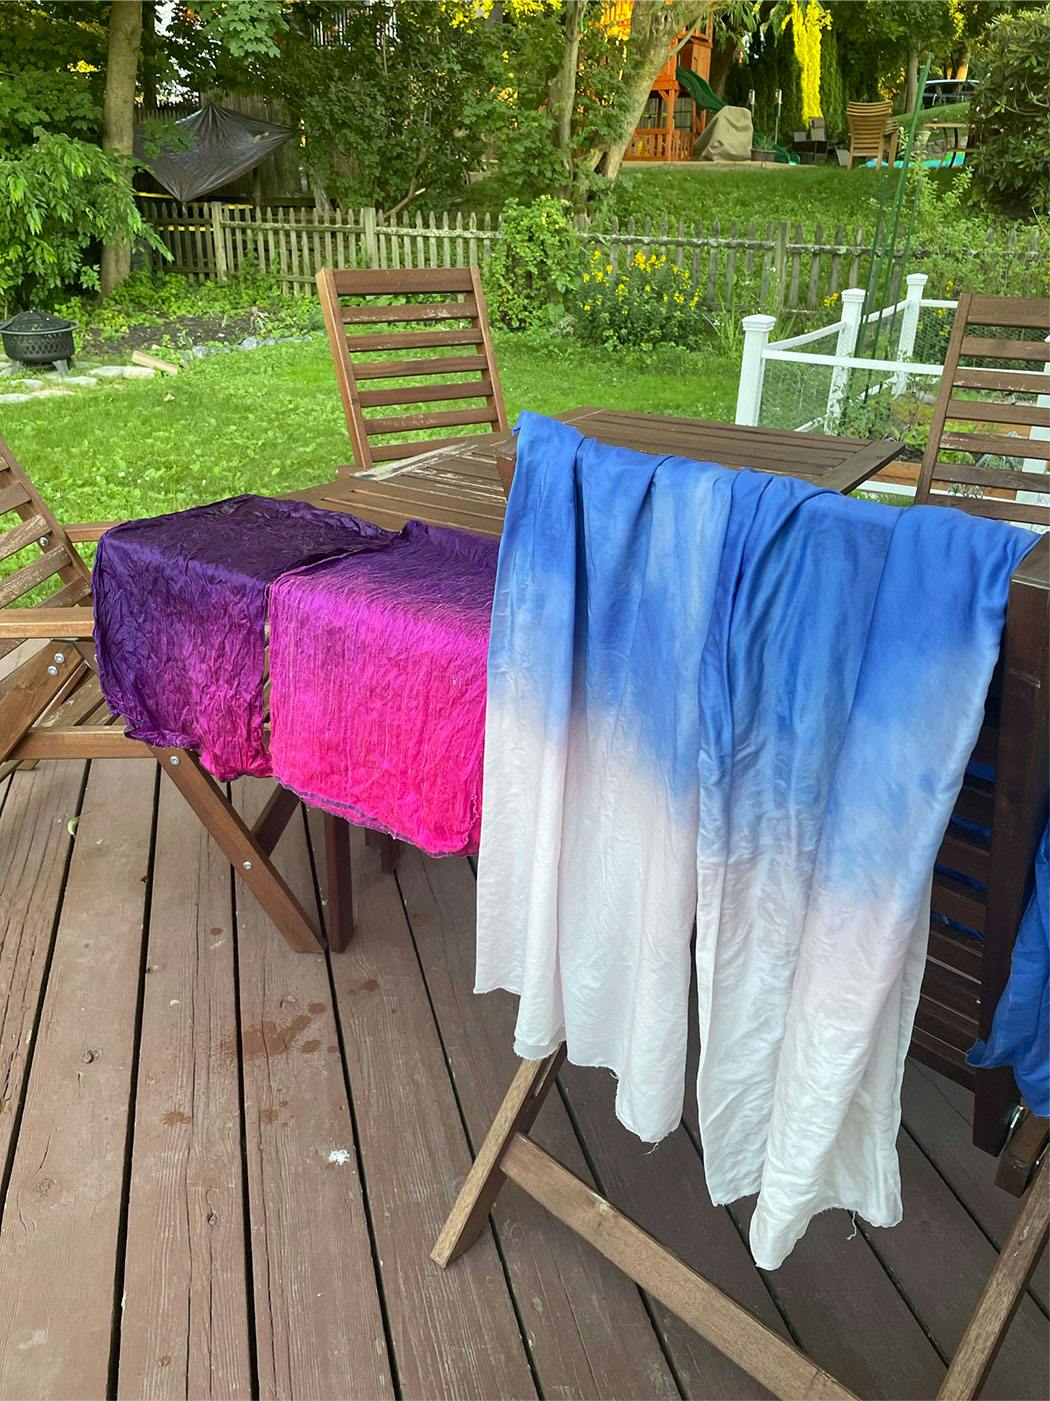
Purple silk fabric was carefully dipped in dye remover to create the ombre effect of the final dress
Embroidery
Once all the SVGs were created and scale confirmed, each SVG was manually digitized into an embroidery pattern, as well as converted into a corresponding cut file for my Silhouette Cameo.
It was challenging to scale everything for both devices so that when the cut file was placed onto the embroidery, it would easily become an applique.

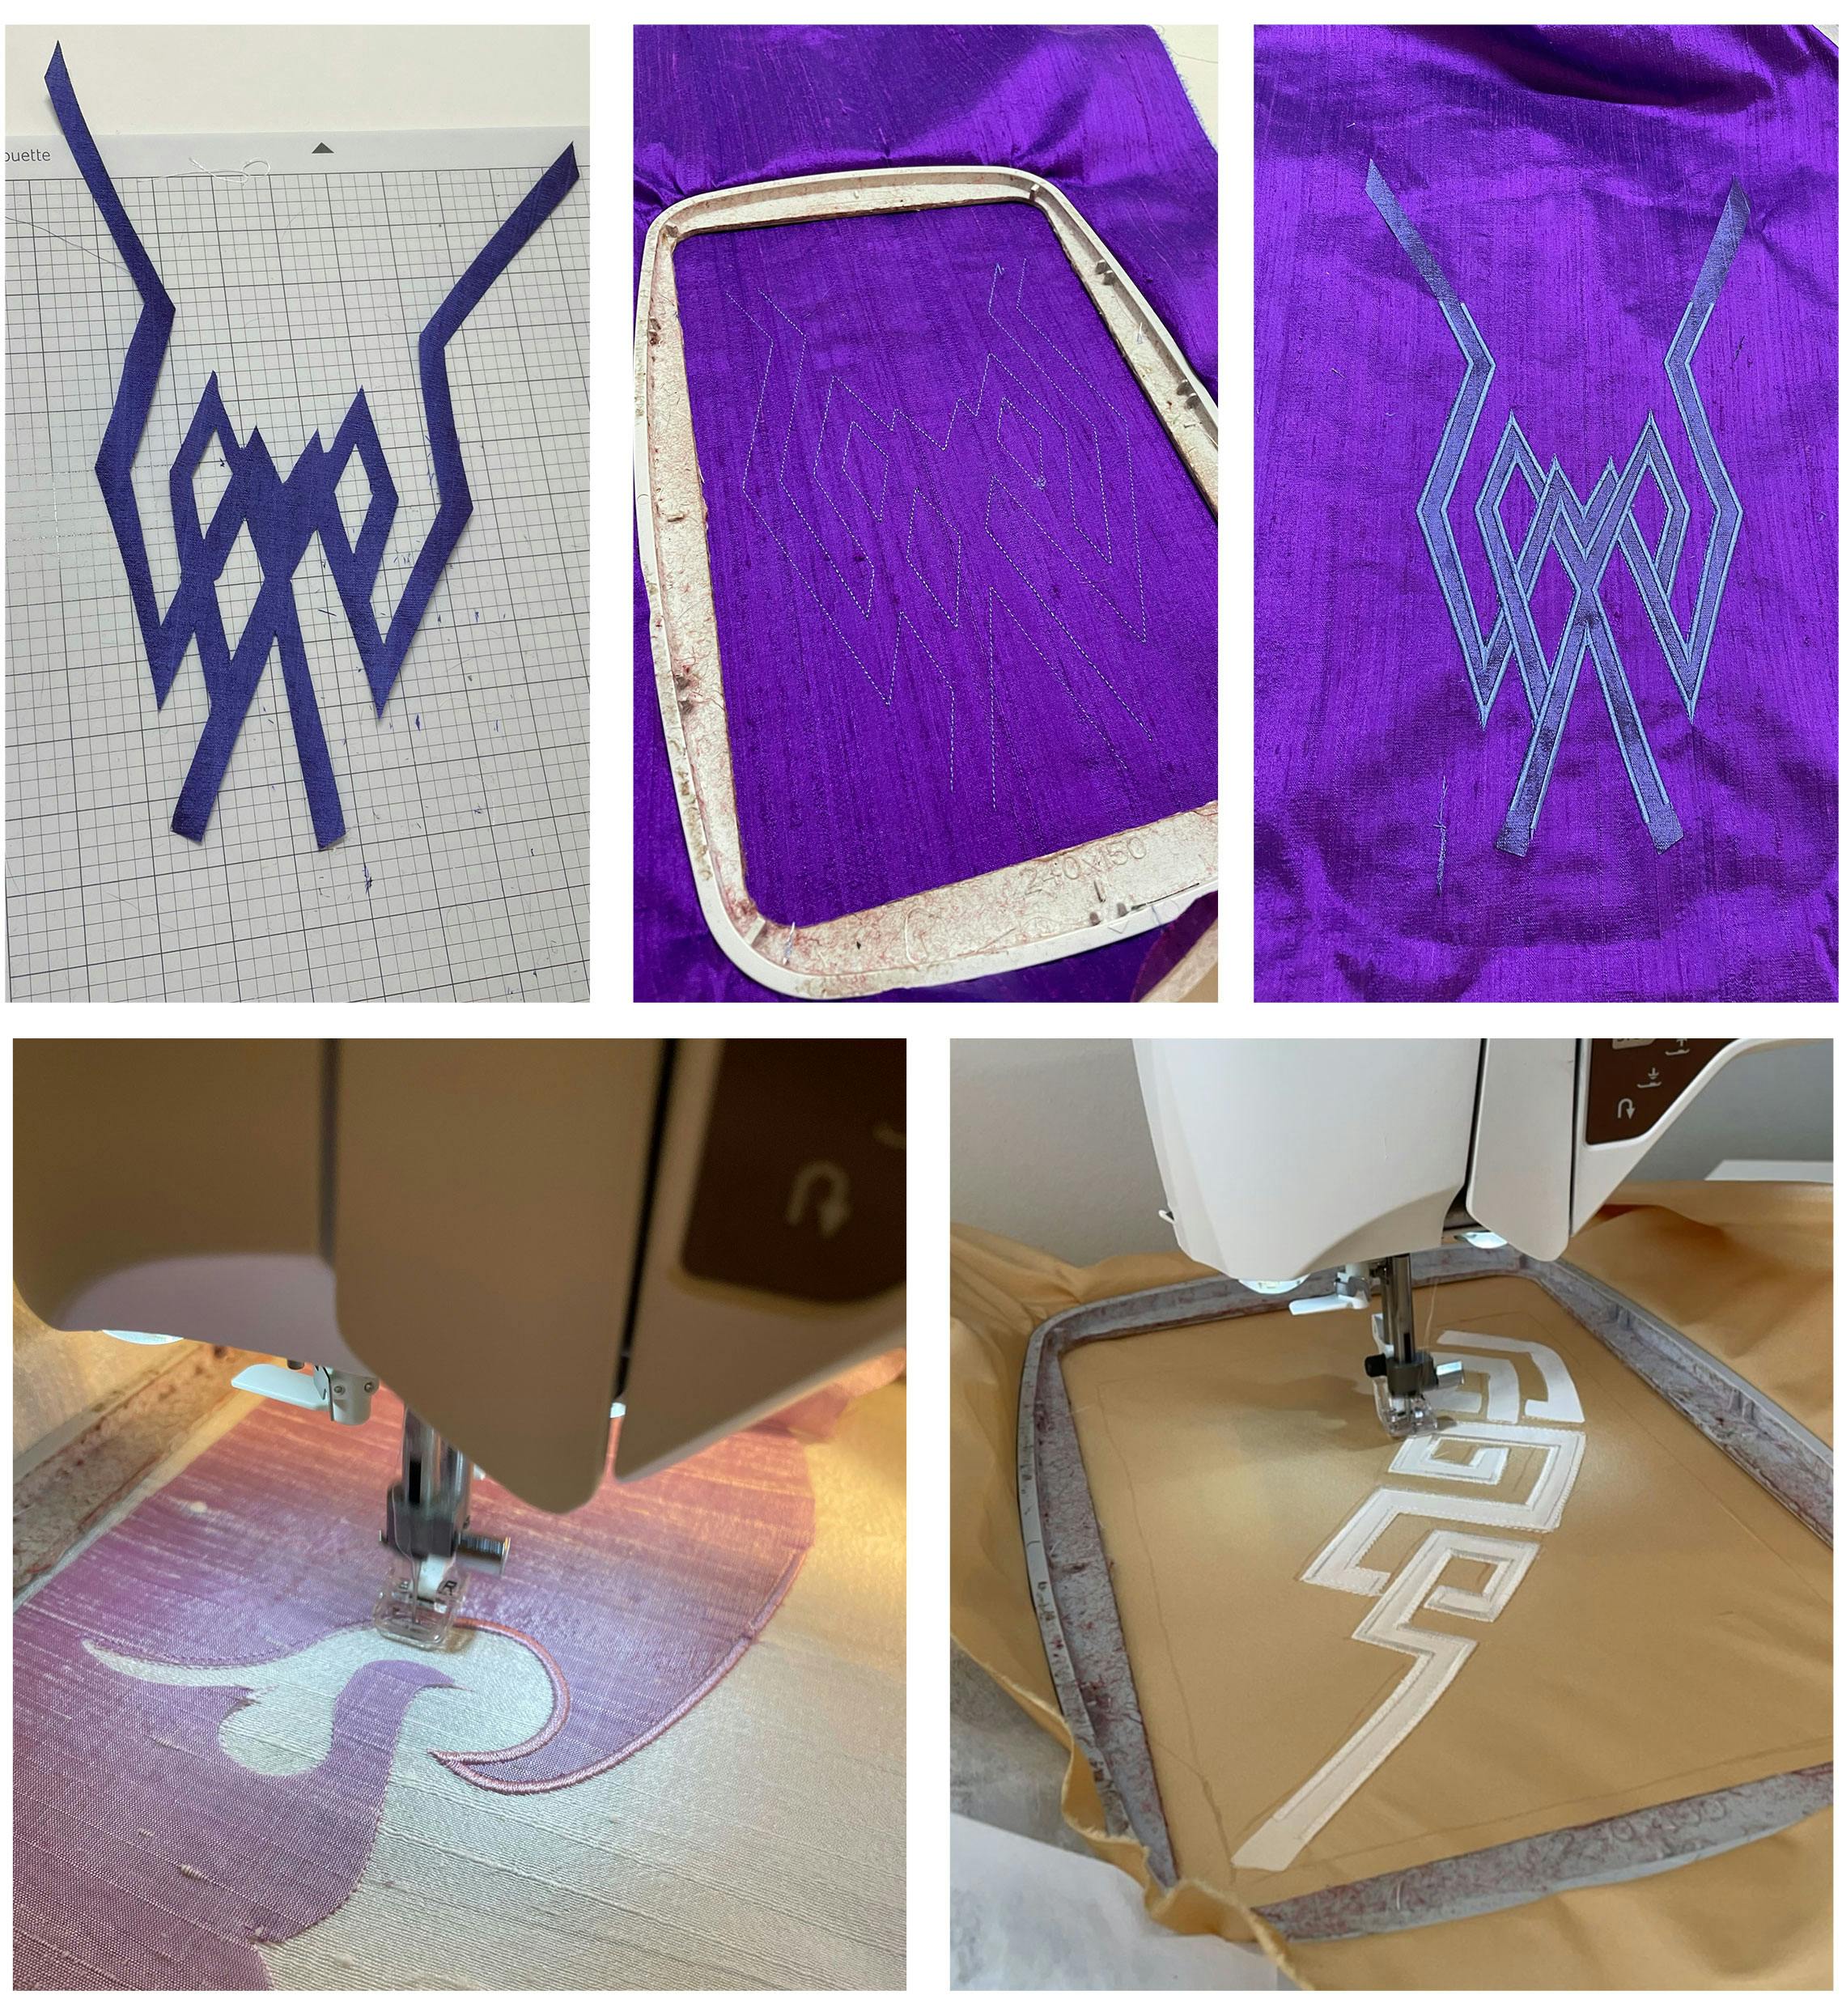
EMBROIDERY PLACEMENT
Each piece of embroidery had to be meticulously positioned over the ombre fabric, and both panels had to match and be symmetrical.
I drew out the shape of each panel, the embroidery design, as well as where I should
position the hoop. I then made sure that my embroidery was digitized to perfectly fit the space,

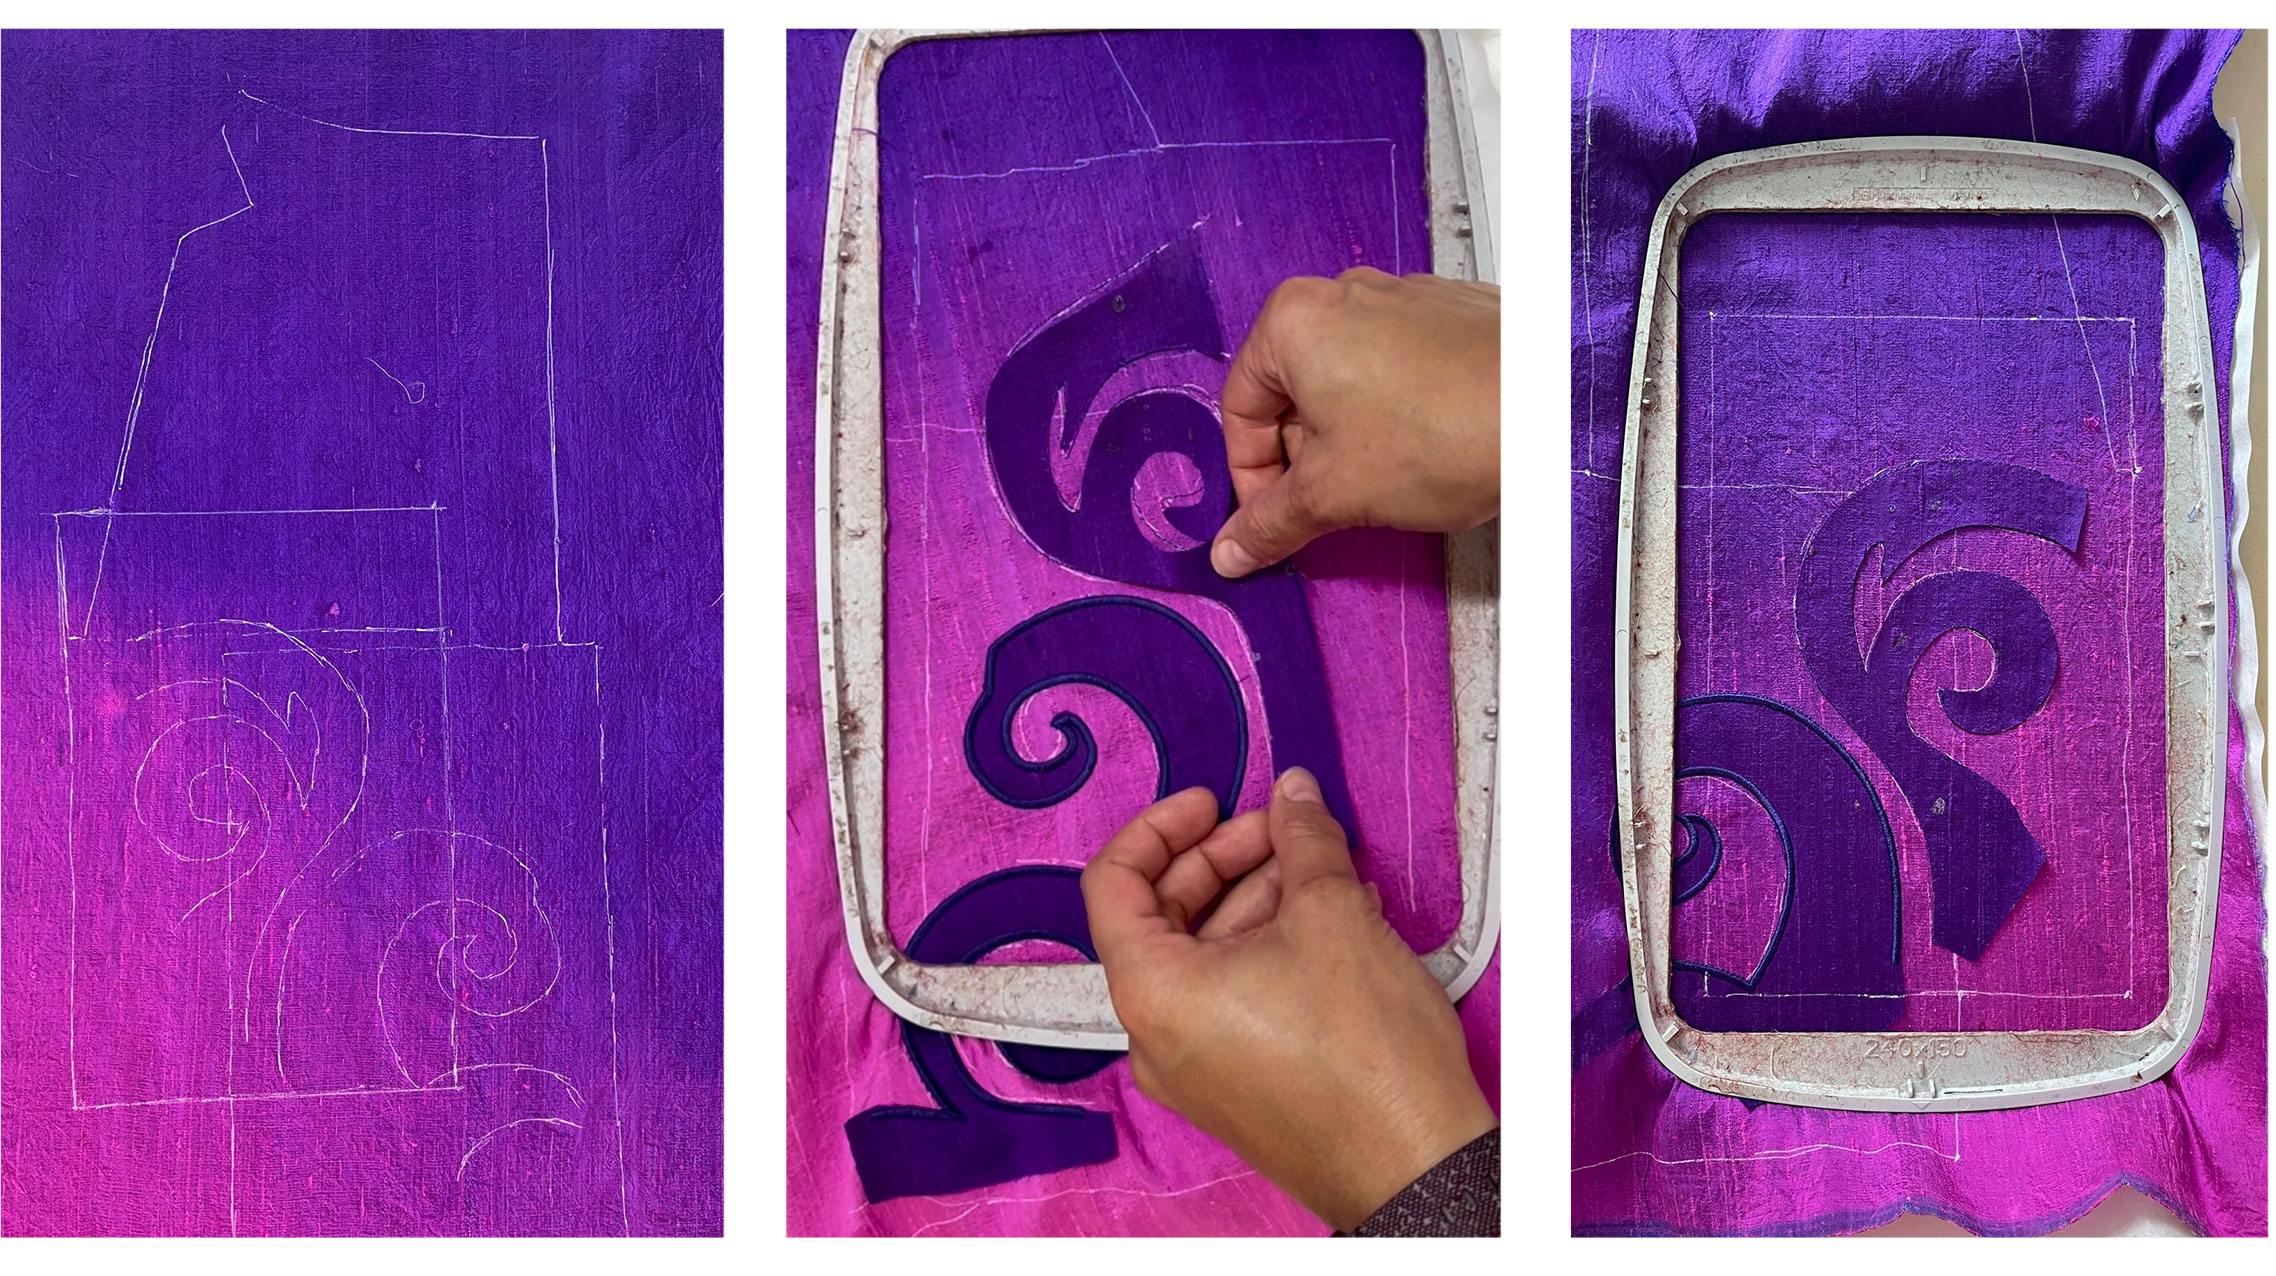
Appliques
For the appliques that go over the embroidery, I wanted to make them from the same silk fabric as the dress. I used the invisible applique technique, and carefully stitched each applique by hand using invisible stitches.
STEPS TO MAKE:
1. Cut out each motif from fusible interfacing
2. Iron the interfacing to one piece of fabric
3. Sew around all visible edges and fold inside out
4. Iron all edges and “holes” flat
5. Carefully tack the finished applique by hand to the right side of the fabric over the embroidery

Construction
Once all the embroidery was finished and each pattern/panel piece was ready, the construction of the dress was the most straightforward part.
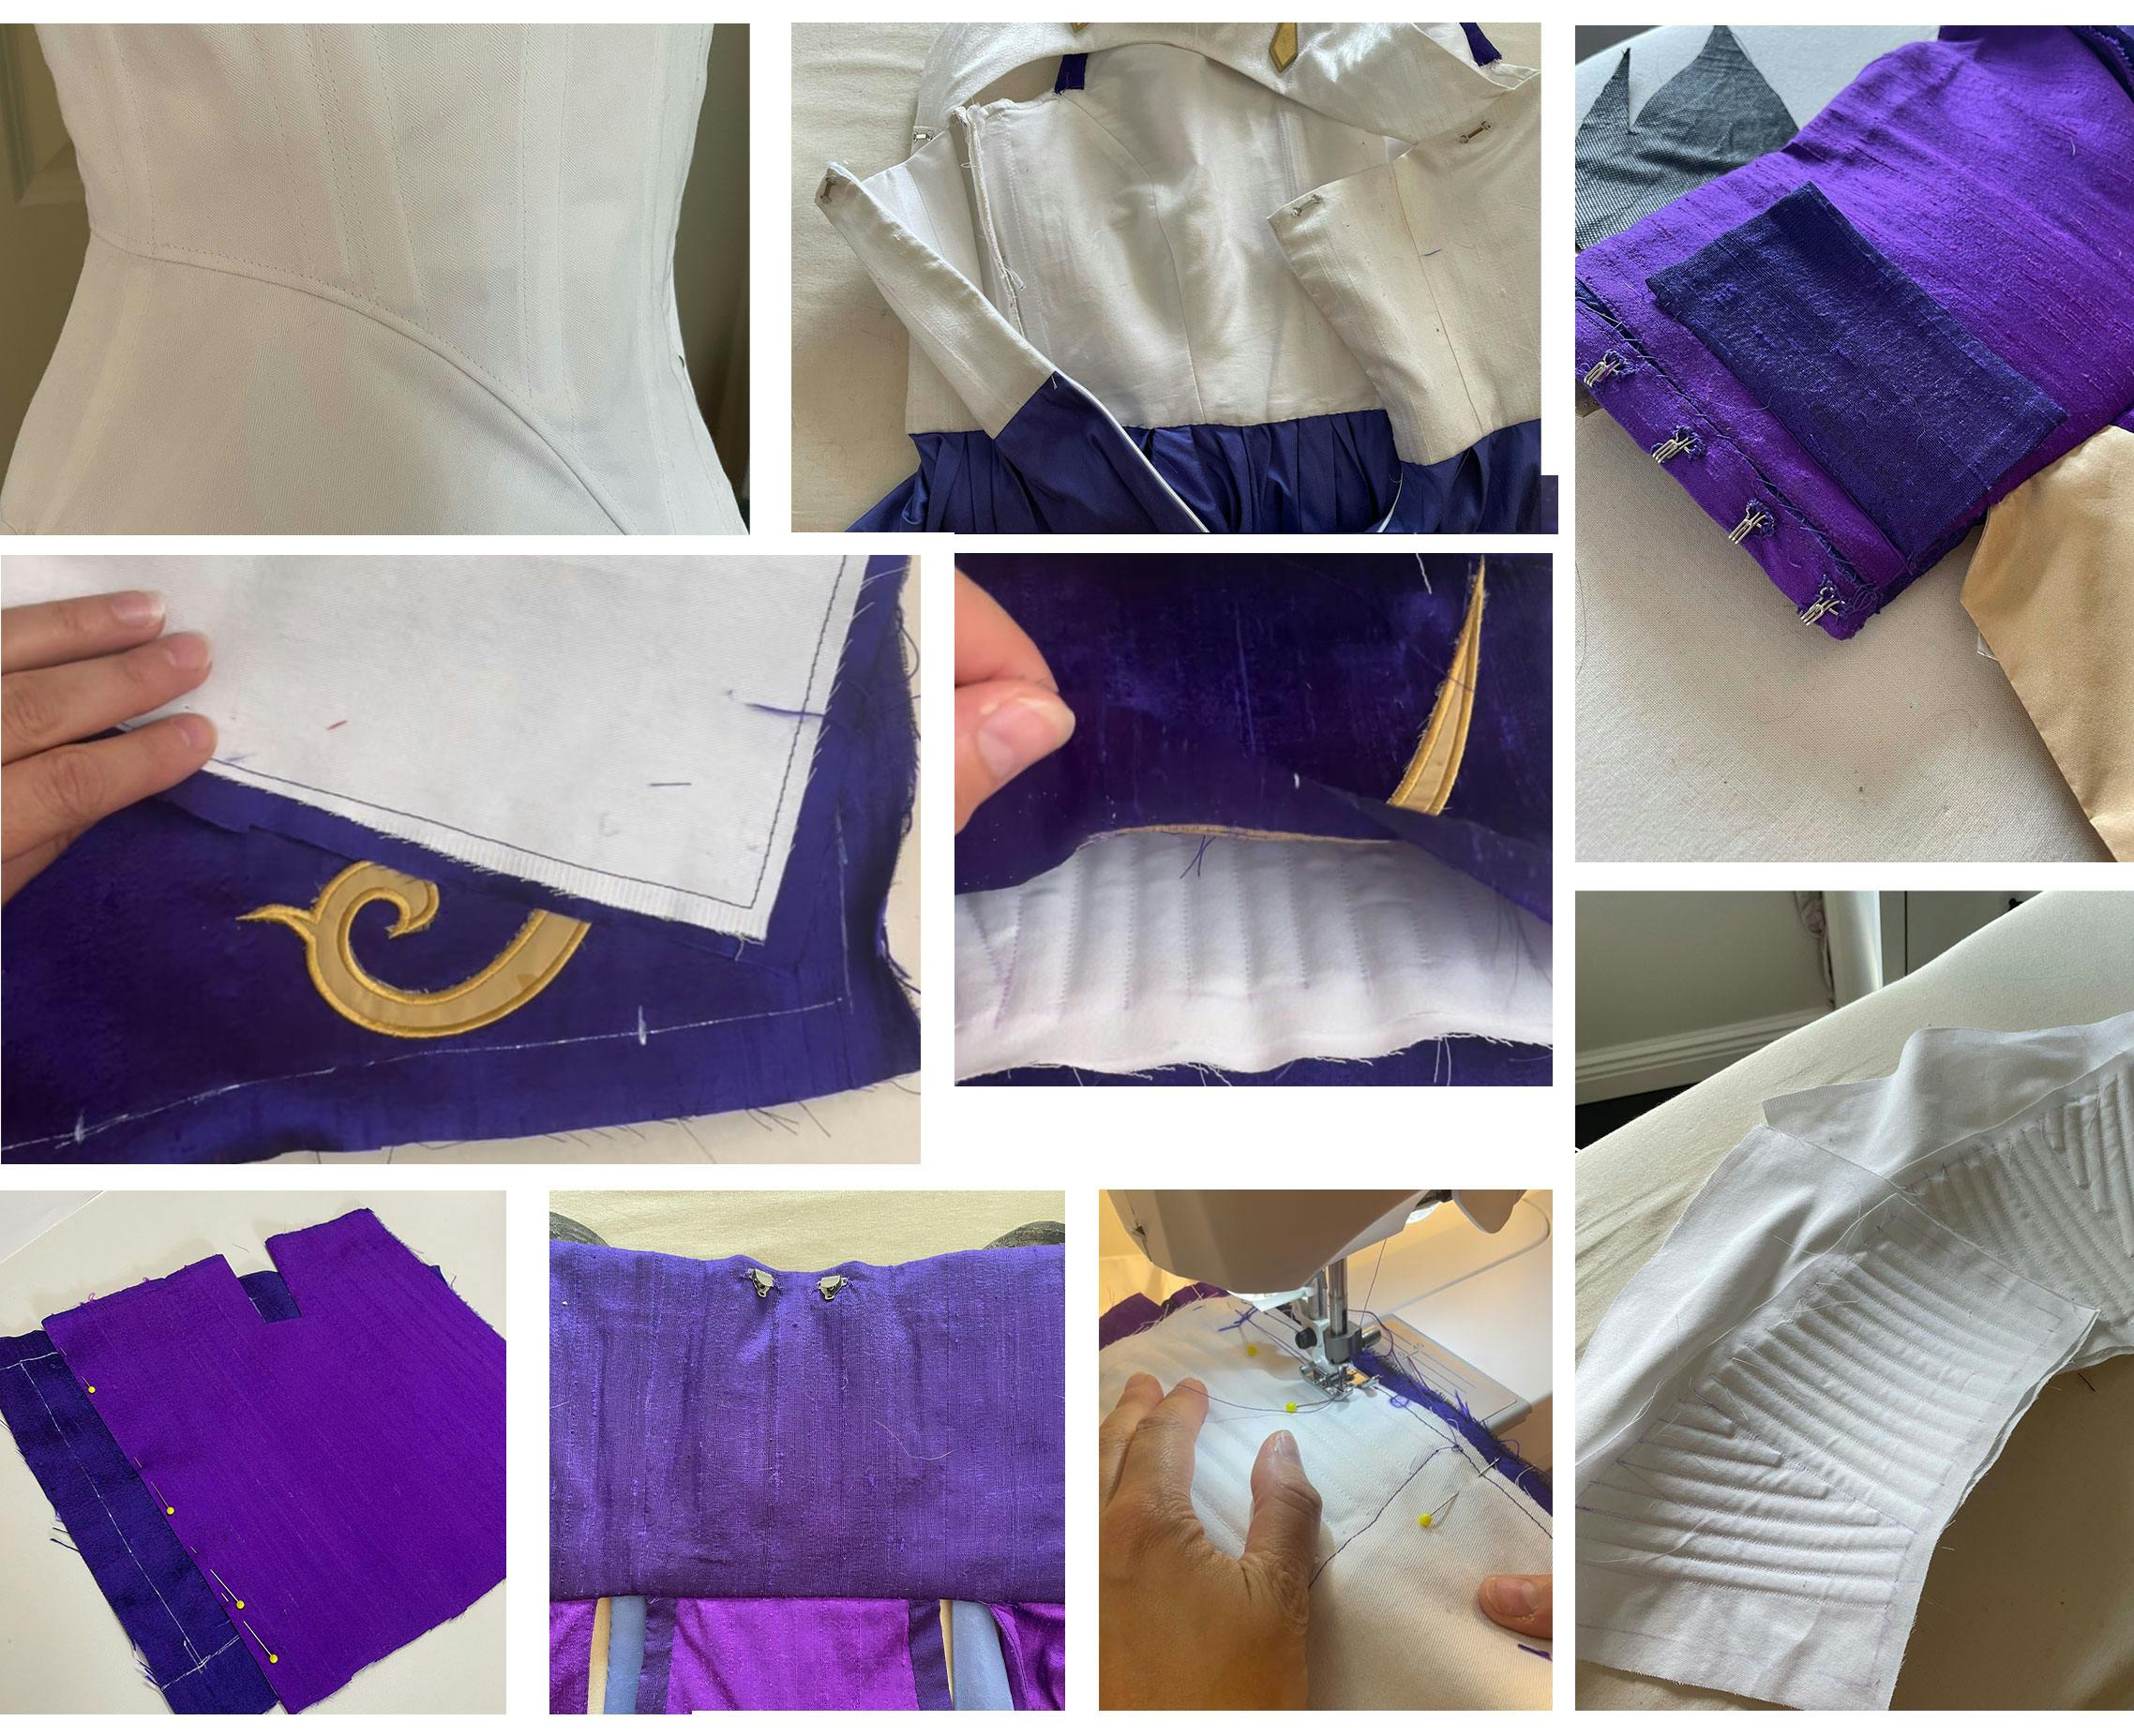
CORSET
The corset is a simple single layer coutil corset with German plastic boning steam shaped into position.
UNDERDRESS
The underdress pieces are flatlined with silk organza, the bodice is lined with cotton, and there is some German plastic boning along several seams. The skirt is a circle skirt gathered with pleats and attached to the bodice.
OVERDRESS
There were some interesting details on the front bodice pieces, so the bodice ended up being lined with the lighter silk dupioni. The whole underdress also has a hidden boned layer, both in the front and the back, which allows it to easily keep its shape and provide a strong foundation for all the accessories.

Sleeves
The sleeves are made from 4 hand painted silk charmeuse panels. The fabric was first soaked in an antifusant, which turns the silk into a canvas and prevents paint from spreading. Then the design was carefully painted on each panel individually.
The upper part of the sleeve consists of a piece of EVA foam wrapped in silk. It was attached to the painted panels by hand and then embellished with an embroidered panel, hand painted 3d printed pieces, ruffles, and cord, and of course elastic to keep everything on my arms.


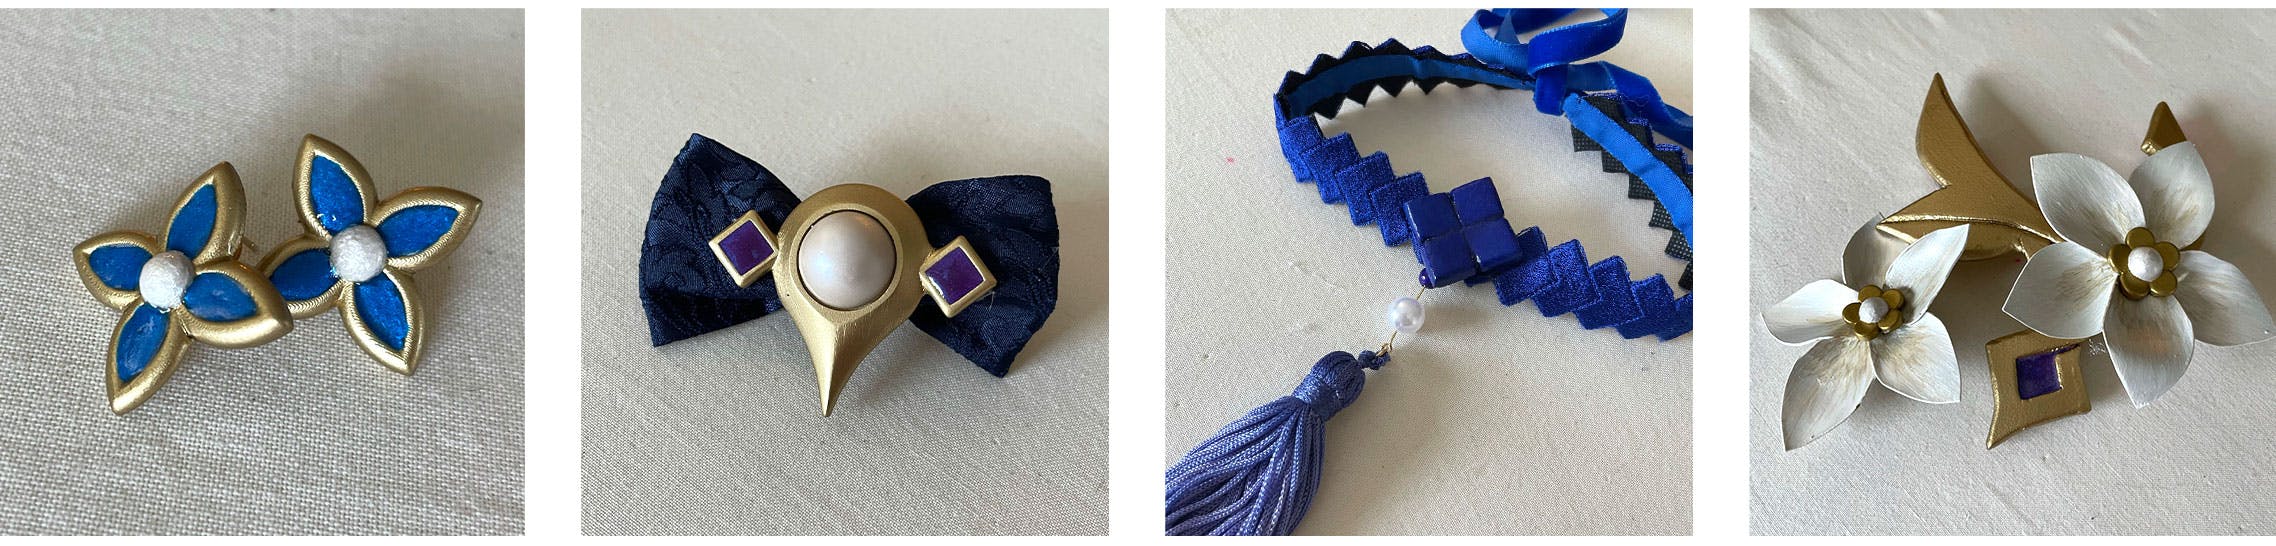
Accessories
All the accessories were made from a combination of EVA foam, 3D printed pieces, embroidery, and resin casting. The 3D

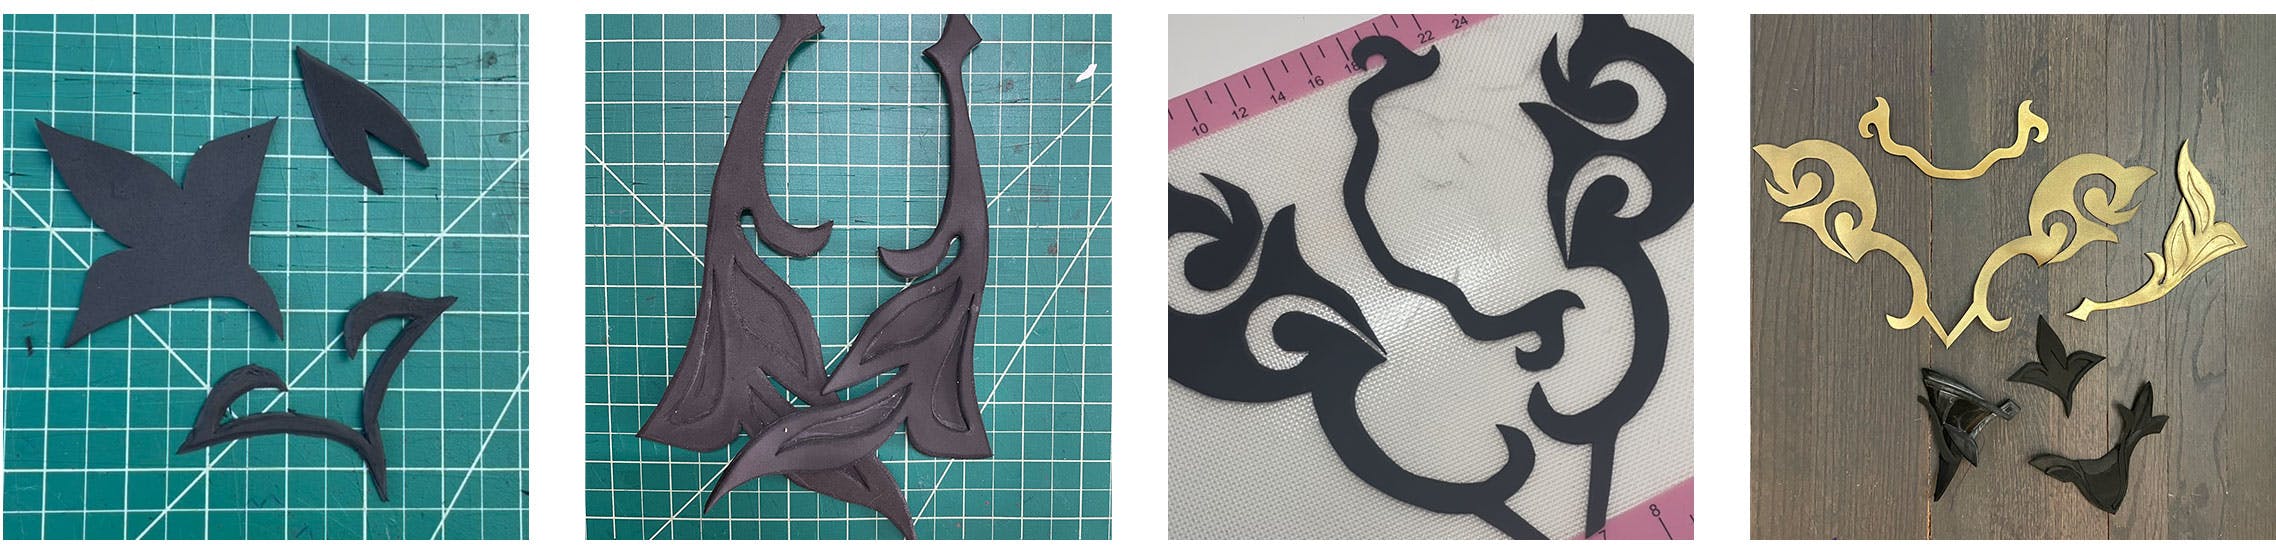
Any accessories that needed to be flexible where made from EVA foam. They were cut, sanded, shaped, primed, and finally painted.
Each 3D print had to be scaled, printed, cleaned, thoroughly sanded, primed, painted and sealed. The bead dangles also had to have a brass eye pins attached to them so they could be turned into jewelry. The vision has LEDs glued to the back.

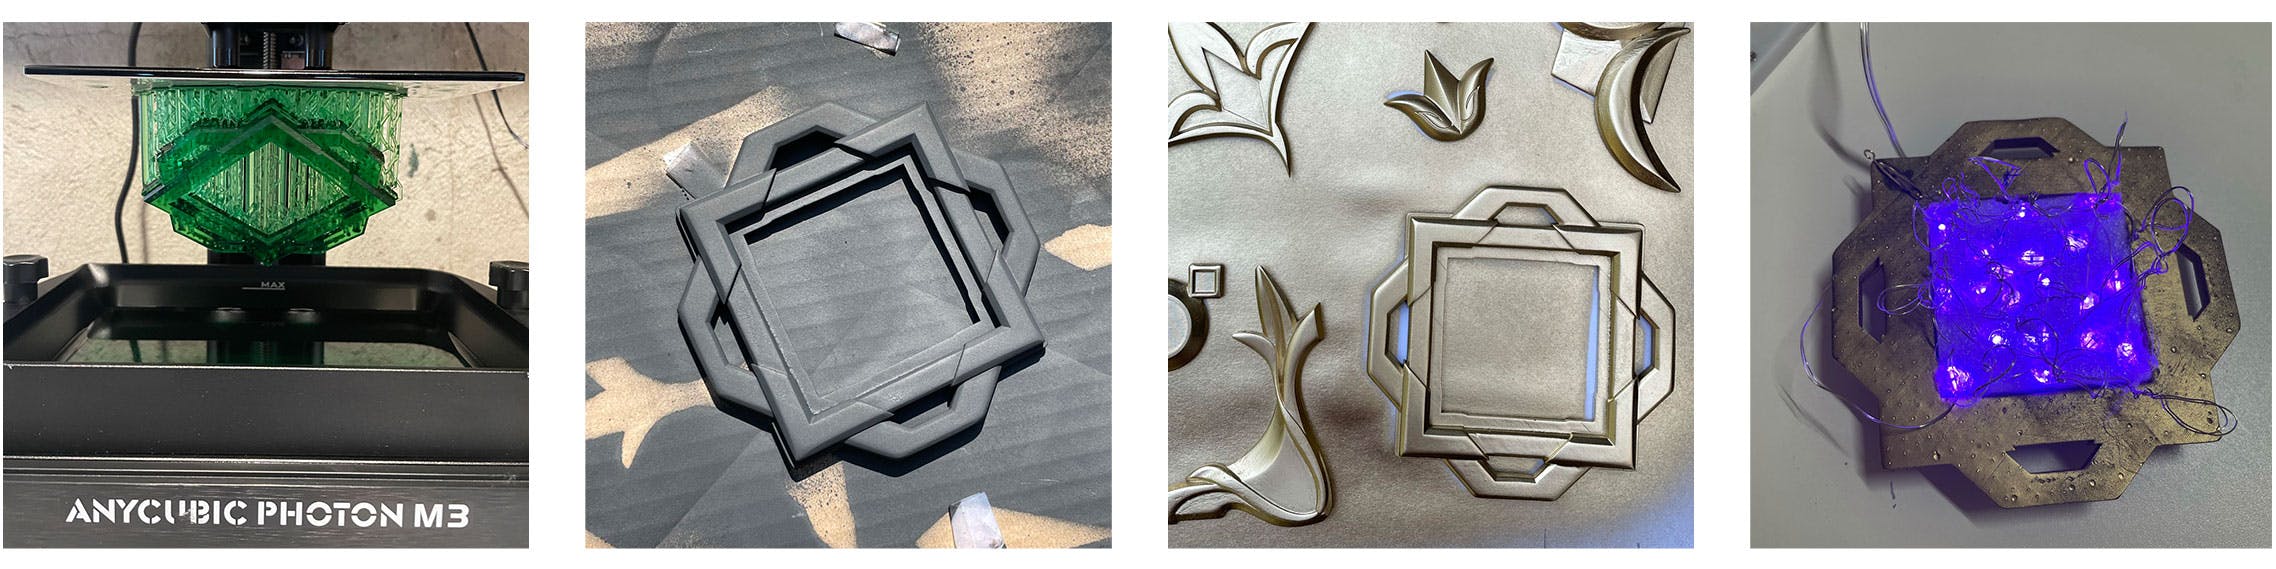
I used 3D printed models created by The Dangerous Ladies on an Anycubic Photon M3 Printer using ABS like Resin. Spray painted with Rustoleum
The front feather was a 6-part embroidery done on polyester organza with water soluble stabilizer. Aligning the hoop after each piece was done was the most challenging part.

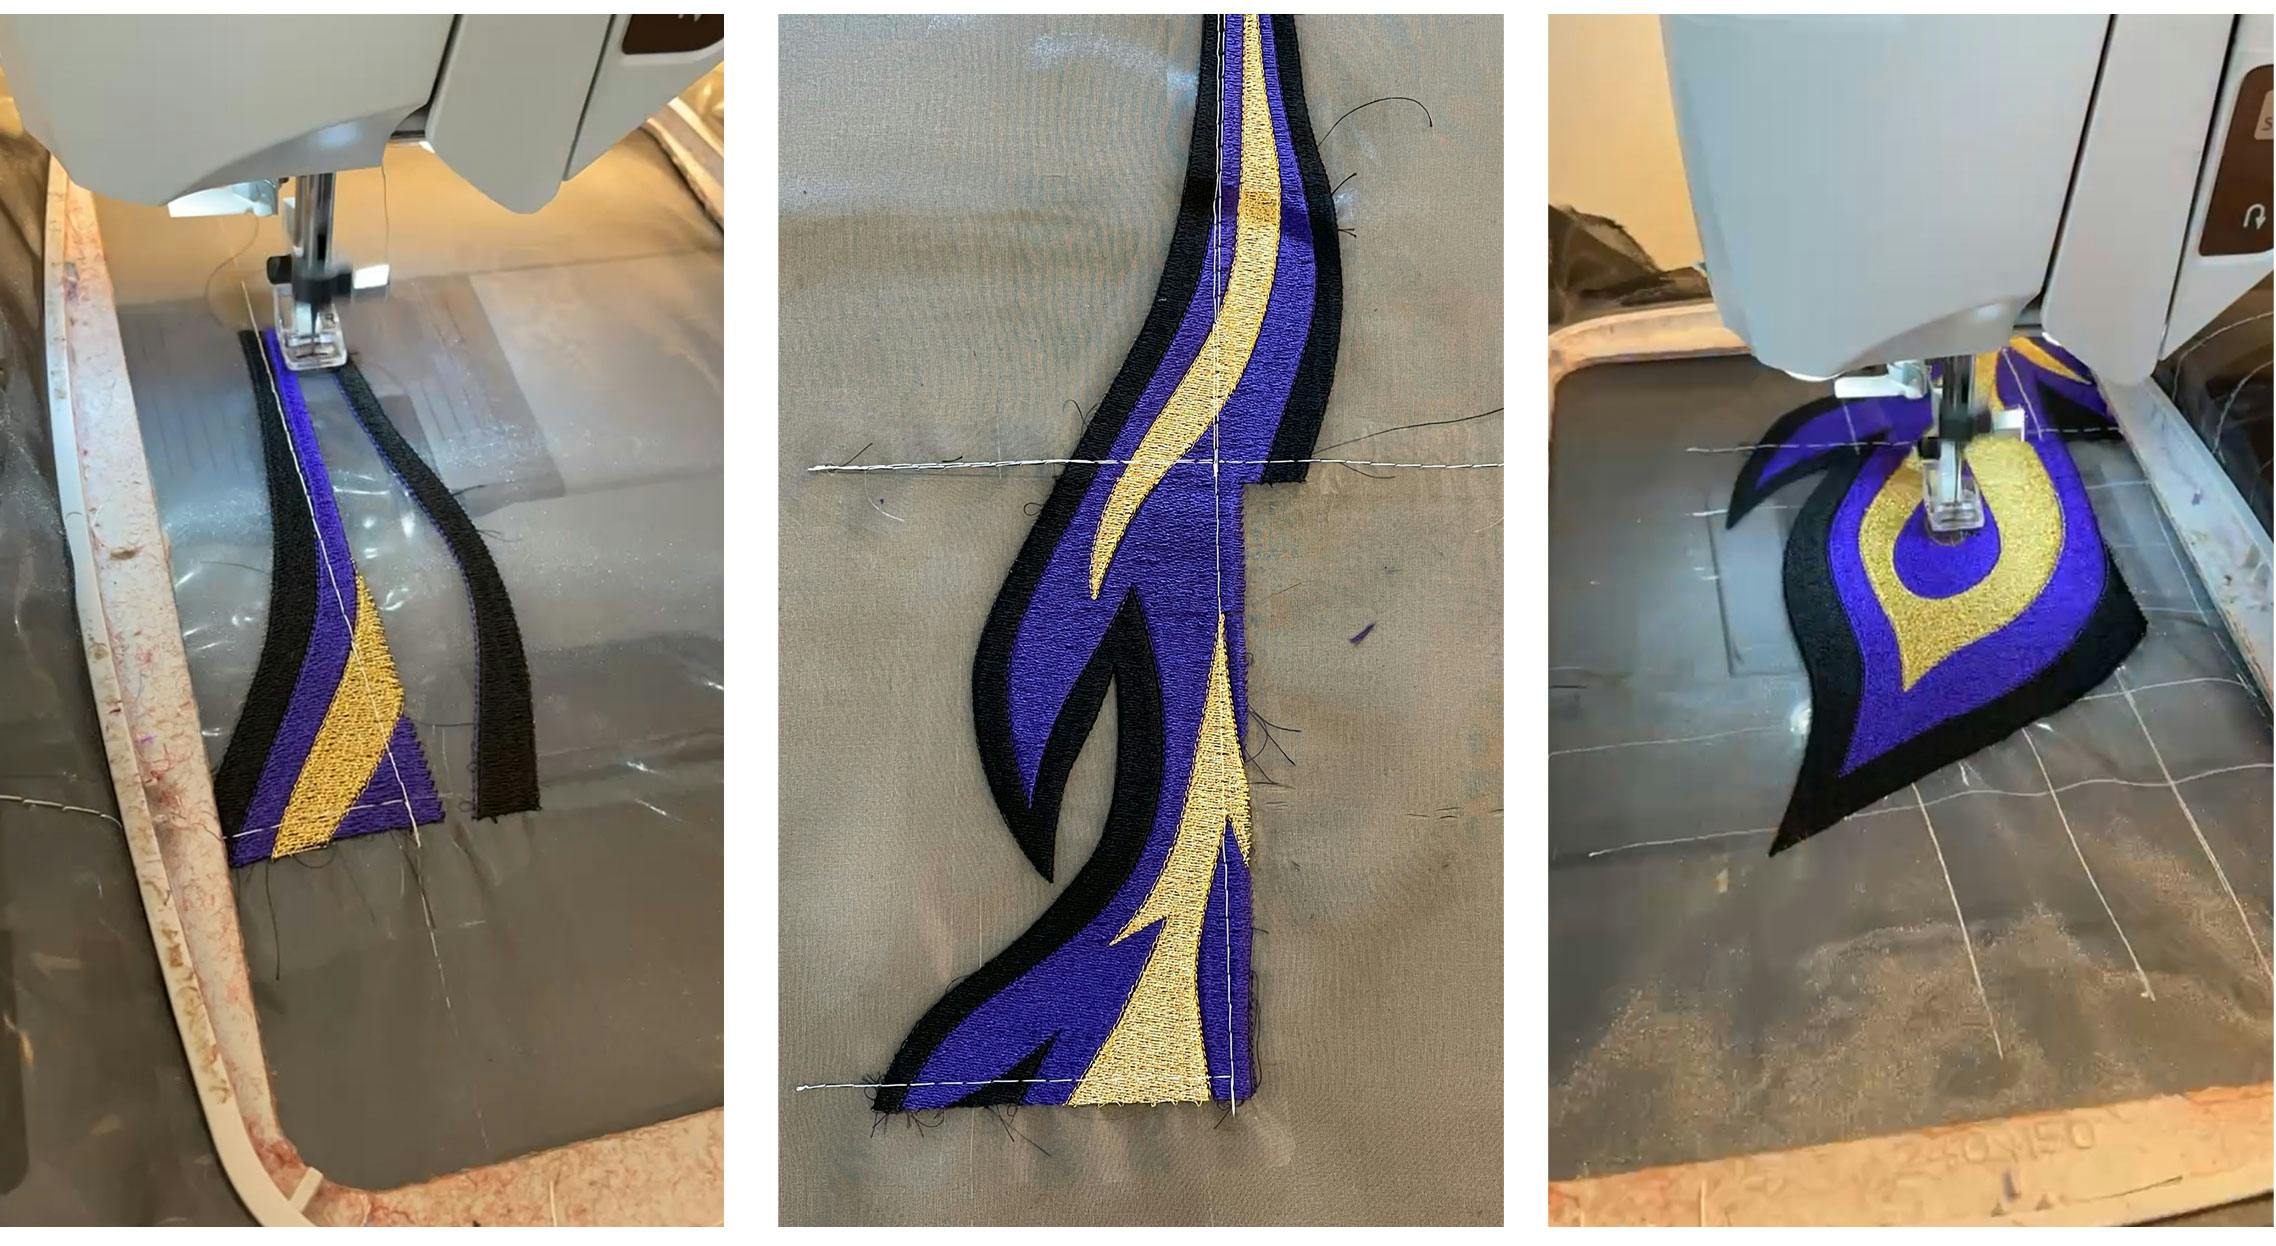
I used Robison Anton thread on a water soluble stabilizer, stitched out on a Viking Topaz 40 sewing machine
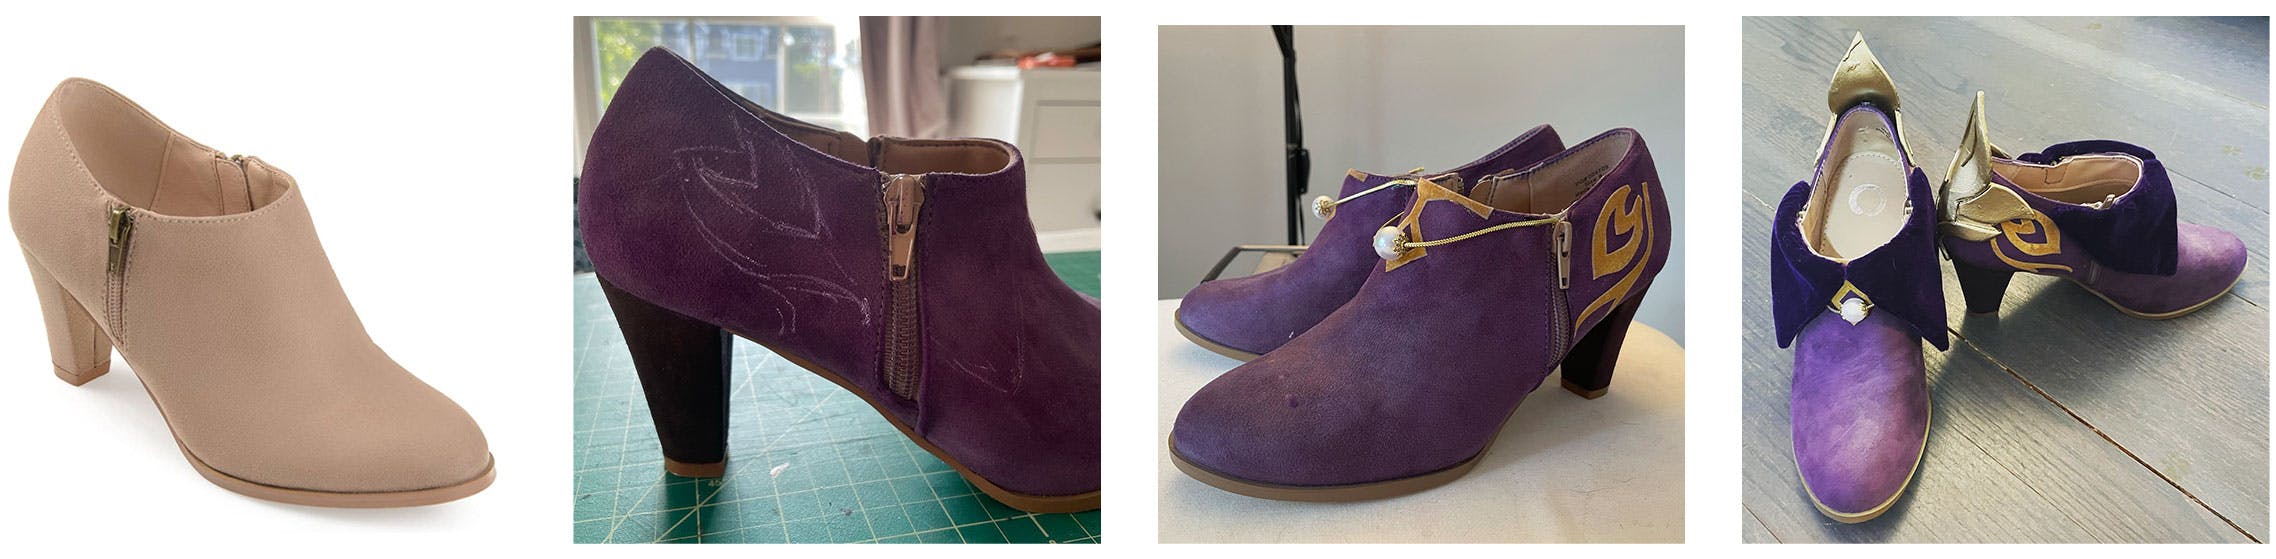
The shoes started out as simple beige shoes which I dyed purple using Angelus leather dye.
The side motifs were made from flocked heat transfer vinyl that I then painted with Jacquard gold paint
The side panels were sewn from velvet, and the back heel piece was made from EVA foam.


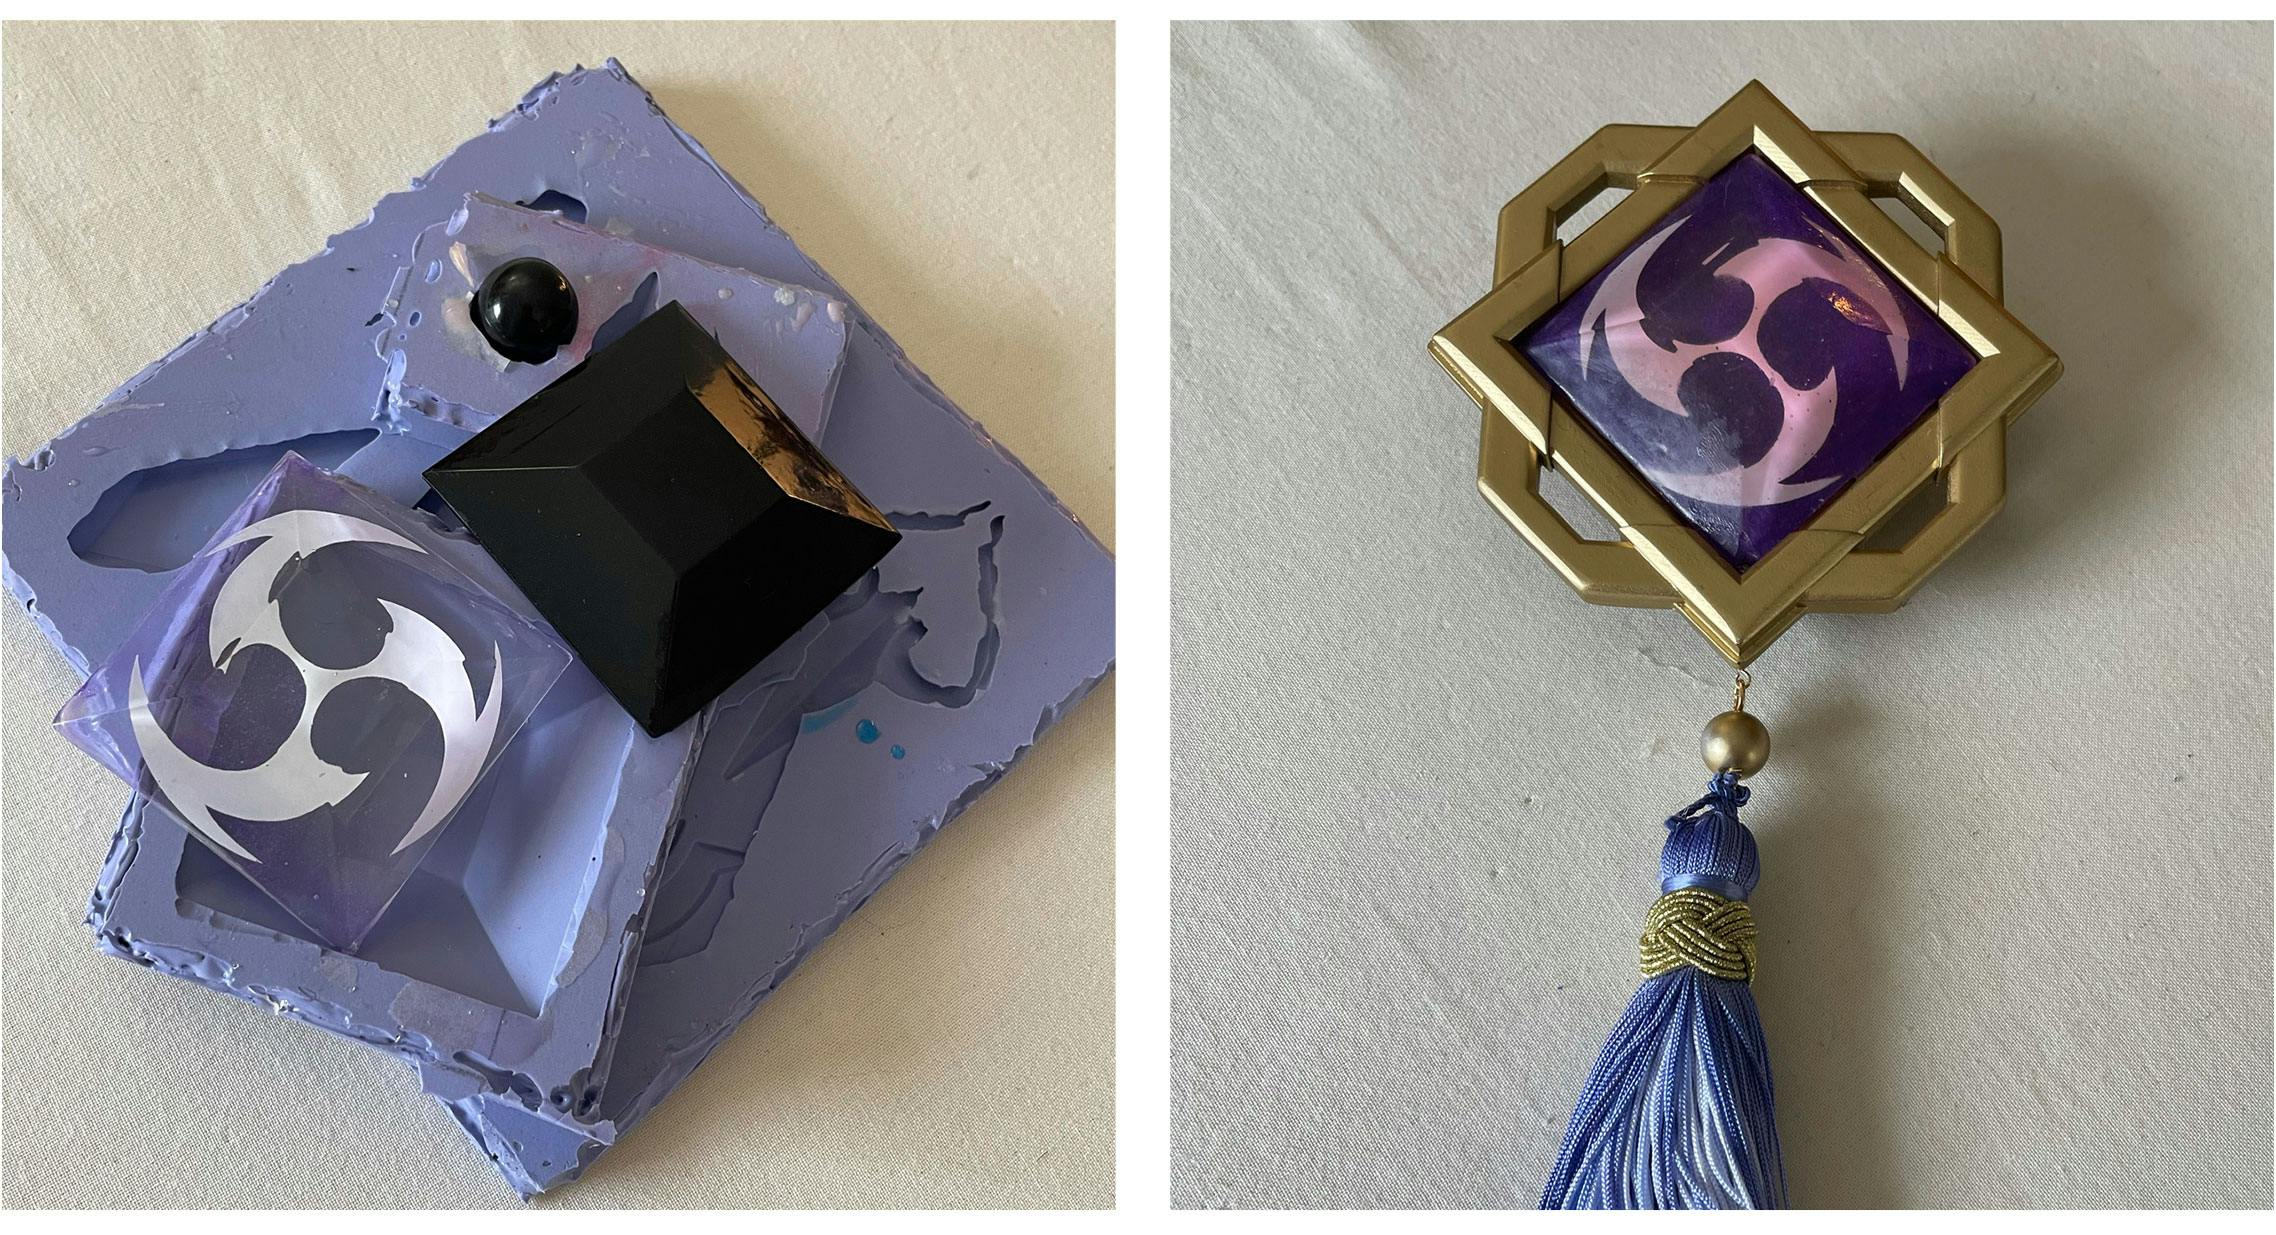
Custom molds made from 3D prints using OOMOO 30-1A:1B silicone mold and Resin Obsessions Resin